Why Are My Rubber Plant Leaves Turning Yellow? Causes and Fixes

September 21, 2026
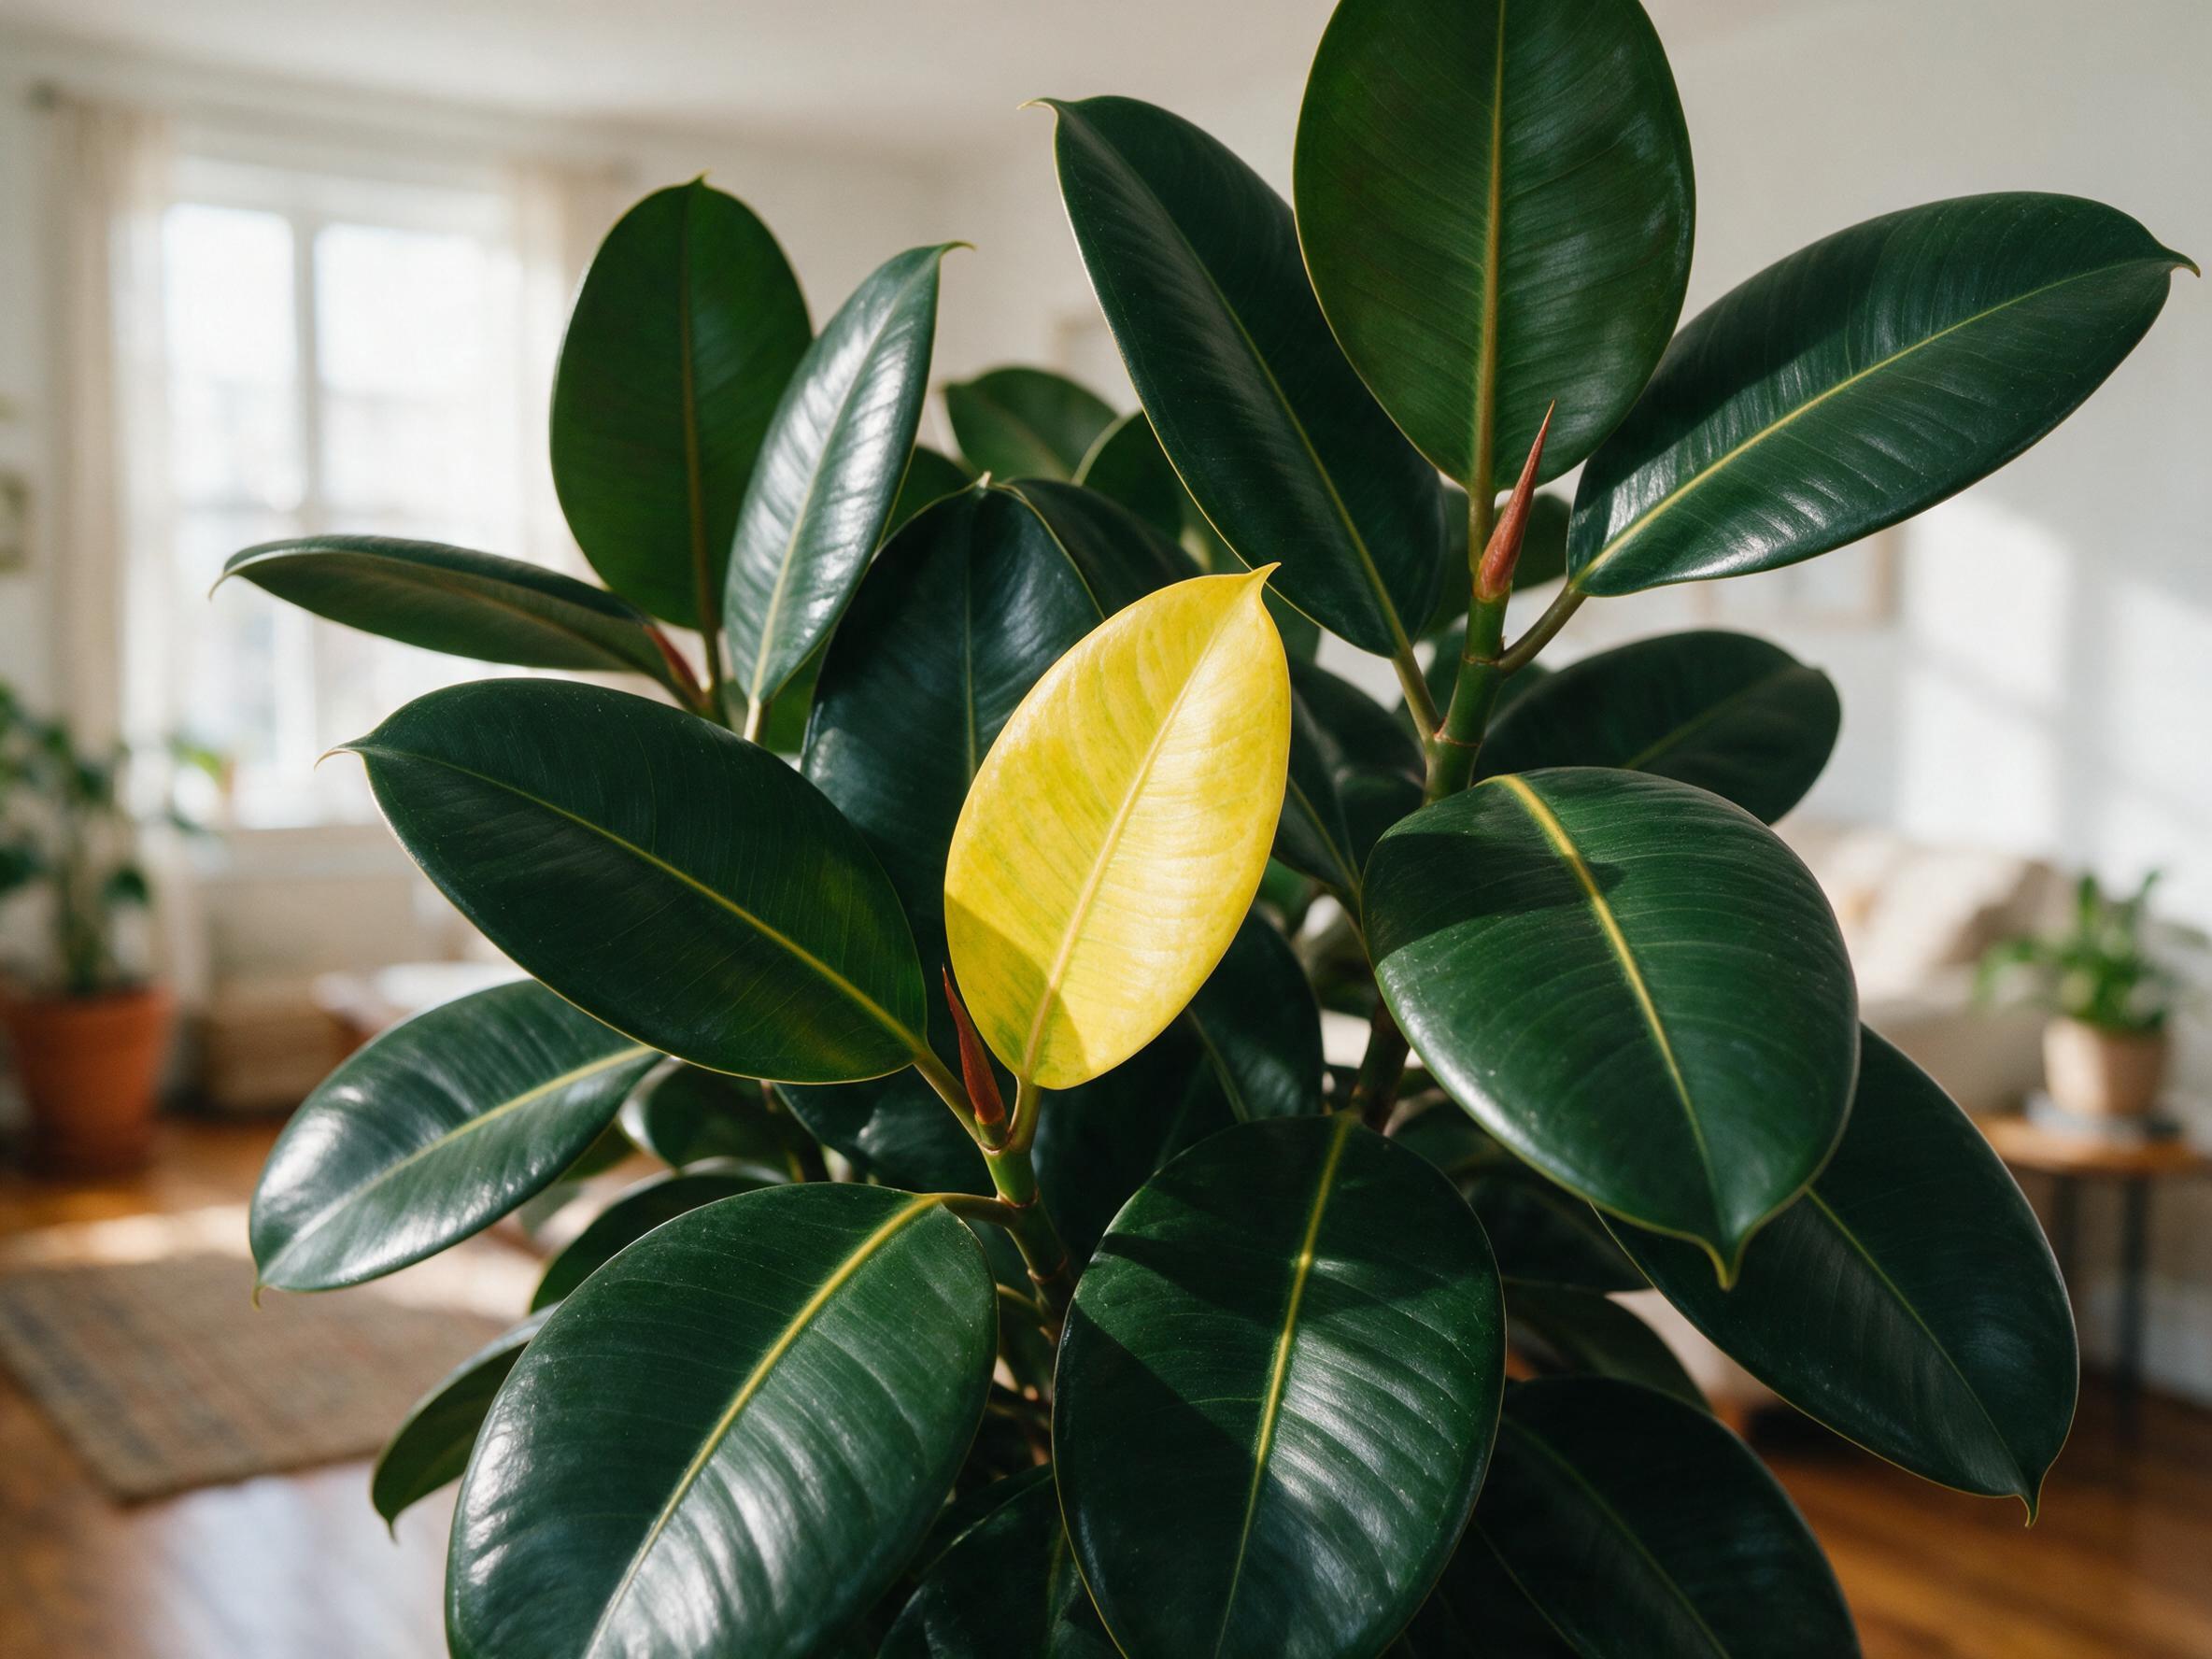
You glance over at your rubber plant and notice it — a leaf that was deep, glossy green just last week is now a dull, sickly yellow. It’s one of the most common distress signals houseplant owners in the US encounter, and the good news is that it’s almost always fixable. Your rubber plant has a limited vocabulary when something is wrong, and yellow leaves are often an early warning sign that it’s headed for bigger problems — but yellow leaves don’t spell the end, and most causes simply require a slight tweak to your care routine.
The tricky part is that yellowing can stem from several very different root causes, and the fix for one can make another worse. This guide walks you through every possible reason your rubber plant’s leaves are turning yellow, how to pinpoint the culprit, and exactly what to do about it. You’ll also find tips to keep it from happening again.
What Does It Mean When Your Rubber Plant Has Yellow Leaves?
Yellow leaves on a rubber plant — known botanically as Ficus elastica — are the plant’s way of telling you that something in its environment or care routine is off. The huge, glossy leaves of a rubber plant make a big impact, so when one or more starts turning yellow, it’s very obvious. The challenge is that yellowing is a symptom, not a diagnosis — it can point to a handful of different problems, each requiring a different solution.
When a leaf turns yellow, chlorophyll — the pigment responsible for green color and photosynthesis — is breaking down. This breakdown can be triggered by stress from water imbalance, poor light, nutrient gaps, temperature swings, pests, or disease. Yellow leaves can indicate overwatering, underwatering, nutrient issues, or pests, so identifying which factor is at play is the essential first step. You’ll learn how to do that systematically later in this guide.
If you want to learn more about the different varieties of this popular houseplant before diving into troubleshooting, check out this overview of different types of rubber plants to understand what variety you’re working with.
Is Yellow Coloring in a Rubber Plant Always a Sign of a Problem?
Not always. The occasional yellow leaf on your rubber plant isn’t necessarily cause for alarm — these plants naturally shed older leaves as they age. This is completely normal behavior and not something you need to stress over.
If there is new growth on your plant and the yellowing leaves are older, particularly at the bottom of the plant, this yellowing is natural. Your plant sheds its old leaves and sends energy to new growth. Think of it like a tree dropping leaves in autumn — it’s a routine part of the plant’s life cycle.
If all of the other leaves on your plant look fine but a couple of the bottom ones are turning yellow and drooping a little, it might just be the age of the leaf. Make sure you check the soil moisture and other causes, but if everything seems as it should be, it’s probably the leaf turning yellow as it ages. As with many plants, when the older foliage matures, it dies and drops off. So long as it’s just one or two leaves here and there and new healthy foliage is developing, it’s nothing to stress about.
Pro Tip: Count how many leaves are yellowing and where they sit on the plant. One or two older lower leaves turning yellow while new growth appears at the top is almost always natural leaf cycling — not a care problem.
Watering Issues Causing Rubber Plant Yellow Leaves
Water problems are the single most common reason rubber plant leaves turn yellow. Both too much and too little water cause yellowing, but they look and feel slightly different — and the fixes are opposite, so getting this right matters.
Overwatering
The most common cause of yellowing leaves among rubber trees is improper soil moisture — in particular, overwatering. If the roots are constantly sitting in excess water, they can’t take up nutrients from the soil — essentially drowning — which leads to root rot. Once root rot sets in, the plant can’t absorb what it needs even when nutrients are present, and the leaves reflect that stress by turning pale yellow.
Other signs of overwatering include the plant becoming squishy or soft to the touch, drooping leaves, blackening of leaves and stem, and starting to lose leaves. If you’re seeing those alongside yellow foliage, overwatering is almost certainly the culprit.
Only water your rubber tree when the top 2–3 inches of soil are dry. Soil should remain damp, but not wet. In winter, you can allow your plant to dry out a little more between waterings. When you water, make sure you provide enough water so that liquid flows from the drainage hole at the bottom of the pot and into the saucer. It’s extremely important to discard any excess water in the saucer, as your rubber tree will not respond well to “wet feet,” which causes the roots to rot.
Underwatering
Underwatering can also lead to yellowing leaves, manifesting as dry, crispy foliage and leaf drop. Watch for signs like soil pulling away from the pot edges and dry topsoil, indicating your rubber tree needs water.
Seasonal Watering Adjustments
A common problem is learning how often to water your plant when you first get it and then not adjusting your schedule with the changing seasons. A rubber plant needs to be watered much more frequently in summer when it’s warm and the soil dries out quickly, compared to winter when cooler temperatures and less sunlight cause water to stay in the potting mix for much longer.
Also pay attention to your pot choice. Pot size matters — choose a pot that accommodates your plant’s root growth without being excessively large. An oversized pot can retain too much water, leading to root rot.
Pro Tip: Skip the calendar-based watering schedule. Instead, press your finger about two inches into the soil before every watering session. If it still feels damp, wait a few more days. A soil moisture meter works even better for consistent readings.
Light Conditions Behind Rubber Plant Yellow Leaves
Light is the second most common trigger for yellowing, and rubber plants are particular about getting it right. Too little light and too much direct sun can both cause problems — just in different ways.
In too much shade or darkness, the foliage will become pale and yellow. This tends to happen throughout the plant and not just on one or two leaves. If you notice uniform yellowing across multiple leaves rather than isolated spots, insufficient light is a strong suspect.
On the other side of the spectrum, rubber trees grow best when placed in bright indirect sunlight. When exposed to direct sunlight for too long, the foliage will burn. Sunburn on rubber plant leaves typically shows up as bleached or yellow patches, often on the side of the leaf facing the window.
Moving your rubber tree to or from bright light too suddenly can also cause yellow leaves from stress. When moving your plant to ensure proper lighting, first consider whether the change will be drastic. If the answer is yes, you’ll need to harden the plant by moving it closer to the window or light source a little bit at a time.
For households with limited natural light, knowing which rooms can support houseplants is half the battle. This guide to the best houseplants for low-light areas can help you decide if your rubber plant is in the right spot — or if a different plant might suit that corner better.
Soil, Nutrients, and Root Health Causing Rubber Plant Yellow Leaves
Even with perfect watering and light, your rubber plant can develop yellow leaves if the soil or nutrient situation is off. There are three main factors to consider here: soil composition, nutrient deficiency, and root-bound conditions.
Soil Composition and Drainage
The potting mix you choose is just as important as your watering technique. You need a well-draining mix that allows water to escape. Don’t use compost or soil meant for outdoor use, as it can be too heavy and trap water for long periods. Mix your potting mix with perlite to encourage aeration in the soil, which allows liquids to move through more quickly, and peat moss to retain just enough moisture to keep the soil damp but not waterlogged.
Nutrient Deficiencies
Nitrogen deficiency primarily affects older leaves, causing them to yellow while new growth remains vibrant. Nitrogen is essential for leaf health and overall growth. Iron deficiency presents as yellowing between leaf veins, leaving the veins themselves green. Iron plays a role in chlorophyll production, so addressing this deficiency is important for lush foliage.
Feed your rubber plant with a balanced, water-soluble fertilizer during the growing season — spring and summer. A balanced fertilizer typically has equal parts nitrogen, phosphorus, and potassium, such as a 10-10-10 formula. Over-fertilizing can harm the plant, so it’s better to use a weaker solution than to risk nutrient burn. Fertilize every 4–6 weeks during the growing season to ensure a steady supply of nutrients.
Root-Bound Plants
Yellowing leaves on a rubber plant could also be a sign that it is pot-bound, so you may want to consider repotting. Select a new pot with adequate drainage that is one to two sizes larger, and fill the base with some fresh potting soil. When you repot, gently tease the roots to remove excess soil and inspect them, pruning any that are dead or diseased with sterile pruning shears.
Environmental Stress Triggering Rubber Plant Yellow Leaves
Rubber plants are tropical plants at heart, and they react strongly to sudden environmental changes. American homes — with central air conditioning in summer and forced-air heating in winter — can create conditions that stress these plants in ways that aren’t always obvious.
Rubber trees don’t like sudden changes, so a major temperature shift — especially outside their ideal 60°F to 77°F range — can leave the leaves yellowing from stress. This also applies to humidity drops, and you may even get slight yellowing from transplant stress.
If your plant was recently moved to a new location, or if the weather changed, exposure to a much colder or hotter temperature than it’s used to can cause leaves to turn yellow or drop off altogether. Keep your rubber plant away from cold drafts, windows, and air vents, and wrap the plant carefully to insulate it if you have to transport it in cold weather.
Low humidity and dry soil cause leaves to droop and brown on their edges, later followed by entire yellowing. Misting the leaves of your rubber tree often will increase the humidity. During winter months in particular, using a humidifier in the room where the plant is located helps maintain consistent humidity levels, especially when indoor air tends to be drier.
You can also place a pebble tray filled with water under the pot — as the water evaporates, it increases the humidity around the plant.
Pests and Disease Leading to Rubber Plant Yellow Leaves
Pests and disease are less common causes of yellowing than watering or light issues, but they can escalate quickly if left unchecked. Knowing what to look for makes early intervention much easier.
Common Pests
Sap-sucking houseplant pests like mealybugs, scale, and spider mites can damage your rubber plant’s tissues, causing spotted, discolored, or yellowing leaves. Spider mites leave fine webbing and stippled leaves in their wake and weaken the plant, leading to further yellowing. Mealybugs are identifiable by cotton-like masses on leaves and stems, and these sap-sucking pests can cause significant yellowing and even leaf drop if left untreated.
Scale appear as flat, brown ovals, often on the undersides of leaves, while spider mites leave traces of webbing behind, and cottony masses on leaves indicate mealybugs.
A weakened or stressed rubber tree is more susceptible to insect infestations. The piercing mouths of insects exhaust your plant and accelerate yellowing, especially if your rubber tree is already unhealthy from poor lighting, a nutrient deficiency, or improper soil moisture.
Disease
Bacterial leaf spot, caused by the bacterial pathogen Xanthomonas campestris, causes the areas between the veins to turn yellow as it advances, though it starts as yellow spots on the foliage. If your plant is infected, the only course of action is to remove the symptomatic leaves and support the plant by ensuring it’s not overcrowded, watering appropriately, and reducing humidity. There is no cure for this disease, so if more than half of the plant is symptomatic, it’s probably best to dispose of it.
Key Insight: If you spot pests early, act immediately. Quarantine the affected plant away from your other houseplants to prevent the infestation from spreading before you begin treatment.
How to Diagnose Why Your Rubber Plant Is Turning Yellow
Working through a logical checklist is the fastest way to pinpoint the cause. Here’s how to approach it step by step.
- Check the location of yellowing leaves. Yellowing only on older, lower leaves with healthy new growth at the top? Likely natural leaf cycling. Yellowing spread throughout the entire plant? Look at light, nutrients, or pests.
- Feel the soil. Push your finger two inches in. Is it soggy and wet? Overwatering. Is it bone dry and pulling away from the pot edges? Underwatering. Is it moist but not waterlogged? Water is probably not the issue.
- Inspect the pot and drainage. Rubber plants really need to be kept in pots with drainage holes. A lack of proper drainage means excess water becomes trapped and roots sit in water unable to dry out.
- Assess the light. Is the plant in a dim corner with no direct window access? Move it closer. Is it sitting in a south-facing window with hours of direct afternoon sun? Move it back or add a sheer curtain.
- Look for pests. Inspect foliage and stems carefully for signs of pests, like sticky, clear honeydew that many sucking insects leave behind. You may also see the pests themselves.
- Think about recent changes. Did you move the plant, repot it, turn on the heat or AC, or bring it inside from outdoors? Environmental stress from sudden changes is a common overlooked trigger.
- Consider fertilization history. Has the plant gone without feeding for more than a season? Nutrient deficiency may be the culprit, especially if yellowing starts on older leaves while new growth looks fine.
If you’d like a digital assist, plant identification apps for iPhone and Android plant apps can help you cross-reference symptoms and get a second opinion on what might be wrong.
How to Fix a Rubber Plant That Is Turning Yellow
Once you’ve identified the cause, here’s how to address each one effectively.
Fix Overwatering and Root Rot
To fix an overwatered rubber plant, immediately put down the watering can. Let the soil dry out almost completely before watering again — the solution could be as simple as that. If root rot has set in, remove the plant from its current soil and repot it. You should start to see some indication of recovery within around a week to 10 days.
When repotting after root rot, snip off the roots that have become mushy and allow other weak roots to fall off. Use a rubber plant-safe fungicide treatment on the roots, then leave your plant to air out of the pot for a full day before repotting into a pot with new soil and good drainage holes.
Fix Underwatering
Give the plant a thorough watering, making sure water flows freely from the drainage holes. Using room-temperature water helps avoid shocking the plant. Going forward, check soil moisture before every session rather than watering on a fixed schedule.
Fix Light Problems
Move your rubber plant to a spot with bright, indirect light — ideally near an east- or north-facing window, or a few feet back from a south- or west-facing one. Rotate the plant every few weeks to ensure even light exposure, promoting balanced growth and lush foliage.
Fix Nutrient Deficiencies
Start a feeding routine using a balanced liquid fertilizer during the growing season. Over-fertilizing can harm the plant, so use a weaker solution rather than risk nutrient burn. Hold off on fertilizing entirely during fall and winter when growth slows.
Fix Pest Infestations
Once you’ve identified a pest, quarantine the plant from the rest of your collection and inspect nearby plants for signs of pest activity. Remove visible insects with a cotton ball dipped in rubbing alcohol, then treat the plant with an organic pesticide like horticultural soap or neem oil regularly to control the infestation.
Remove the Yellow Leaves
Once you’ve addressed the underlying cause, remove yellow leaves after fixing the issue and continue normal care. Yellow leaves will not turn green again — removing them redirects the plant’s energy toward healthy new growth.
For more detailed guidance on caring for this plant overall, the rubber tree houseplant care guide covers everything from potting to pruning in one place.
How to Prevent Rubber Plant Yellow Leaves Going Forward
Prevention is far easier than recovery. Once your rubber plant is back to health, a few consistent habits will keep yellow leaves from returning.
- Water by feel, not by schedule. A plant’s moisture needs vary from week to week depending on the weather, light exposure, soil compaction, how much your HVAC is running, and the time of year. You can’t assume that because the calendar says so, it’s time to water.
- Choose the right soil and pot from the start. Opt for well-draining soil to prevent waterlogging, a common cause of root rot and subsequent leaf yellowing. Make sure your pot always has drainage holes.
- Maintain stable temperatures. Rubber plants prefer bright, indirect light and fare best when kept in temperatures in the 65 to 80 degrees F range. Keep them away from cold drafts near windows and heating or cooling vents.
- Boost humidity in dry months. To increase humidity for a rubber plant during winter, mist the plant daily or place it on a tray of pebbles filled with water.
- Feed during the growing season. Fertilize with a balanced formula every 4–6 weeks from spring through summer, then stop in fall and winter.
- Repot before the plant becomes root-bound. Check the roots annually. If roots are circling the bottom of the pot or poking out of drainage holes, it’s time for a larger container.
- Inspect regularly for pests. Consistency is key — regular monitoring and maintenance help you catch potential issues before they become a full-blown leaf crisis.
- Introduce changes gradually. Whether you’re moving the plant to a new room or adjusting its light, make changes slowly so the plant can acclimate without stress-induced yellowing.
If you’re building out a fuller houseplant collection, exploring different types of plants can help you find companions that thrive under similar care conditions as your rubber plant. You might also find it helpful to understand how to keep cats out of houseplants if pets are disrupting your plant’s soil or leaves.
Frequently Asked Questions
Why are the lower leaves on my rubber plant turning yellow?
Lower leaf yellowing is often natural — rubber plants shed older foliage as they grow. If there is new growth on your plant and the yellowing leaves are older, particularly at the bottom of the plant, this yellowing is natural. Your plant sheds its old leaves and sends energy to new growth. If multiple leaves throughout the plant are yellowing, investigate watering, light, or nutrients.
Can a rubber plant recover from root rot?
Yes, if caught early enough. If root rot has set in, remove the plant from its current soil and repot it into fresh mix. You should start to see some indication of recovery within around a week to 10 days. Trim away all mushy roots and treat with a fungicide before repotting.
How much light does a rubber plant need?
Finding the right balance is key. Rubber plants prefer bright, indirect light, so keep them near a window but out of direct sunlight. An east-facing window is often ideal for US homes.
Should I remove yellow leaves from my rubber plant?
Yes. Yellow leaves will not recover their green color. Removing them keeps the plant tidy and redirects energy toward healthy foliage. Always address the underlying cause first — otherwise new leaves will continue to yellow.
How often should I fertilize my rubber plant?
Feed your rubber plant with a balanced, water-soluble fertilizer during the growing season — spring and summer — every 4–6 weeks to ensure a steady supply of nutrients. Do not fertilize in fall or winter when the plant is not actively growing.
Can overwatering and underwatering look the same?
They can, which is why checking the soil directly is so important. When a houseplant has been overwatered, it can develop root rot, a condition in which the roots are slowly destroyed, preventing the plant from absorbing water and nutrients. This makes it look like the plant isn’t getting enough water, so ensure the soil is dry before trying to compensate.
What pests most commonly affect rubber plants?
Scale, mealybugs, and spider mites occur frequently in indoor conditions. Check the undersides of leaves and along stems regularly, and treat at the first sign of infestation with neem oil or insecticidal soap.