Why Is My Peace Lily Turning Black? Causes, Fixes, and Prevention Tips

August 31, 2026
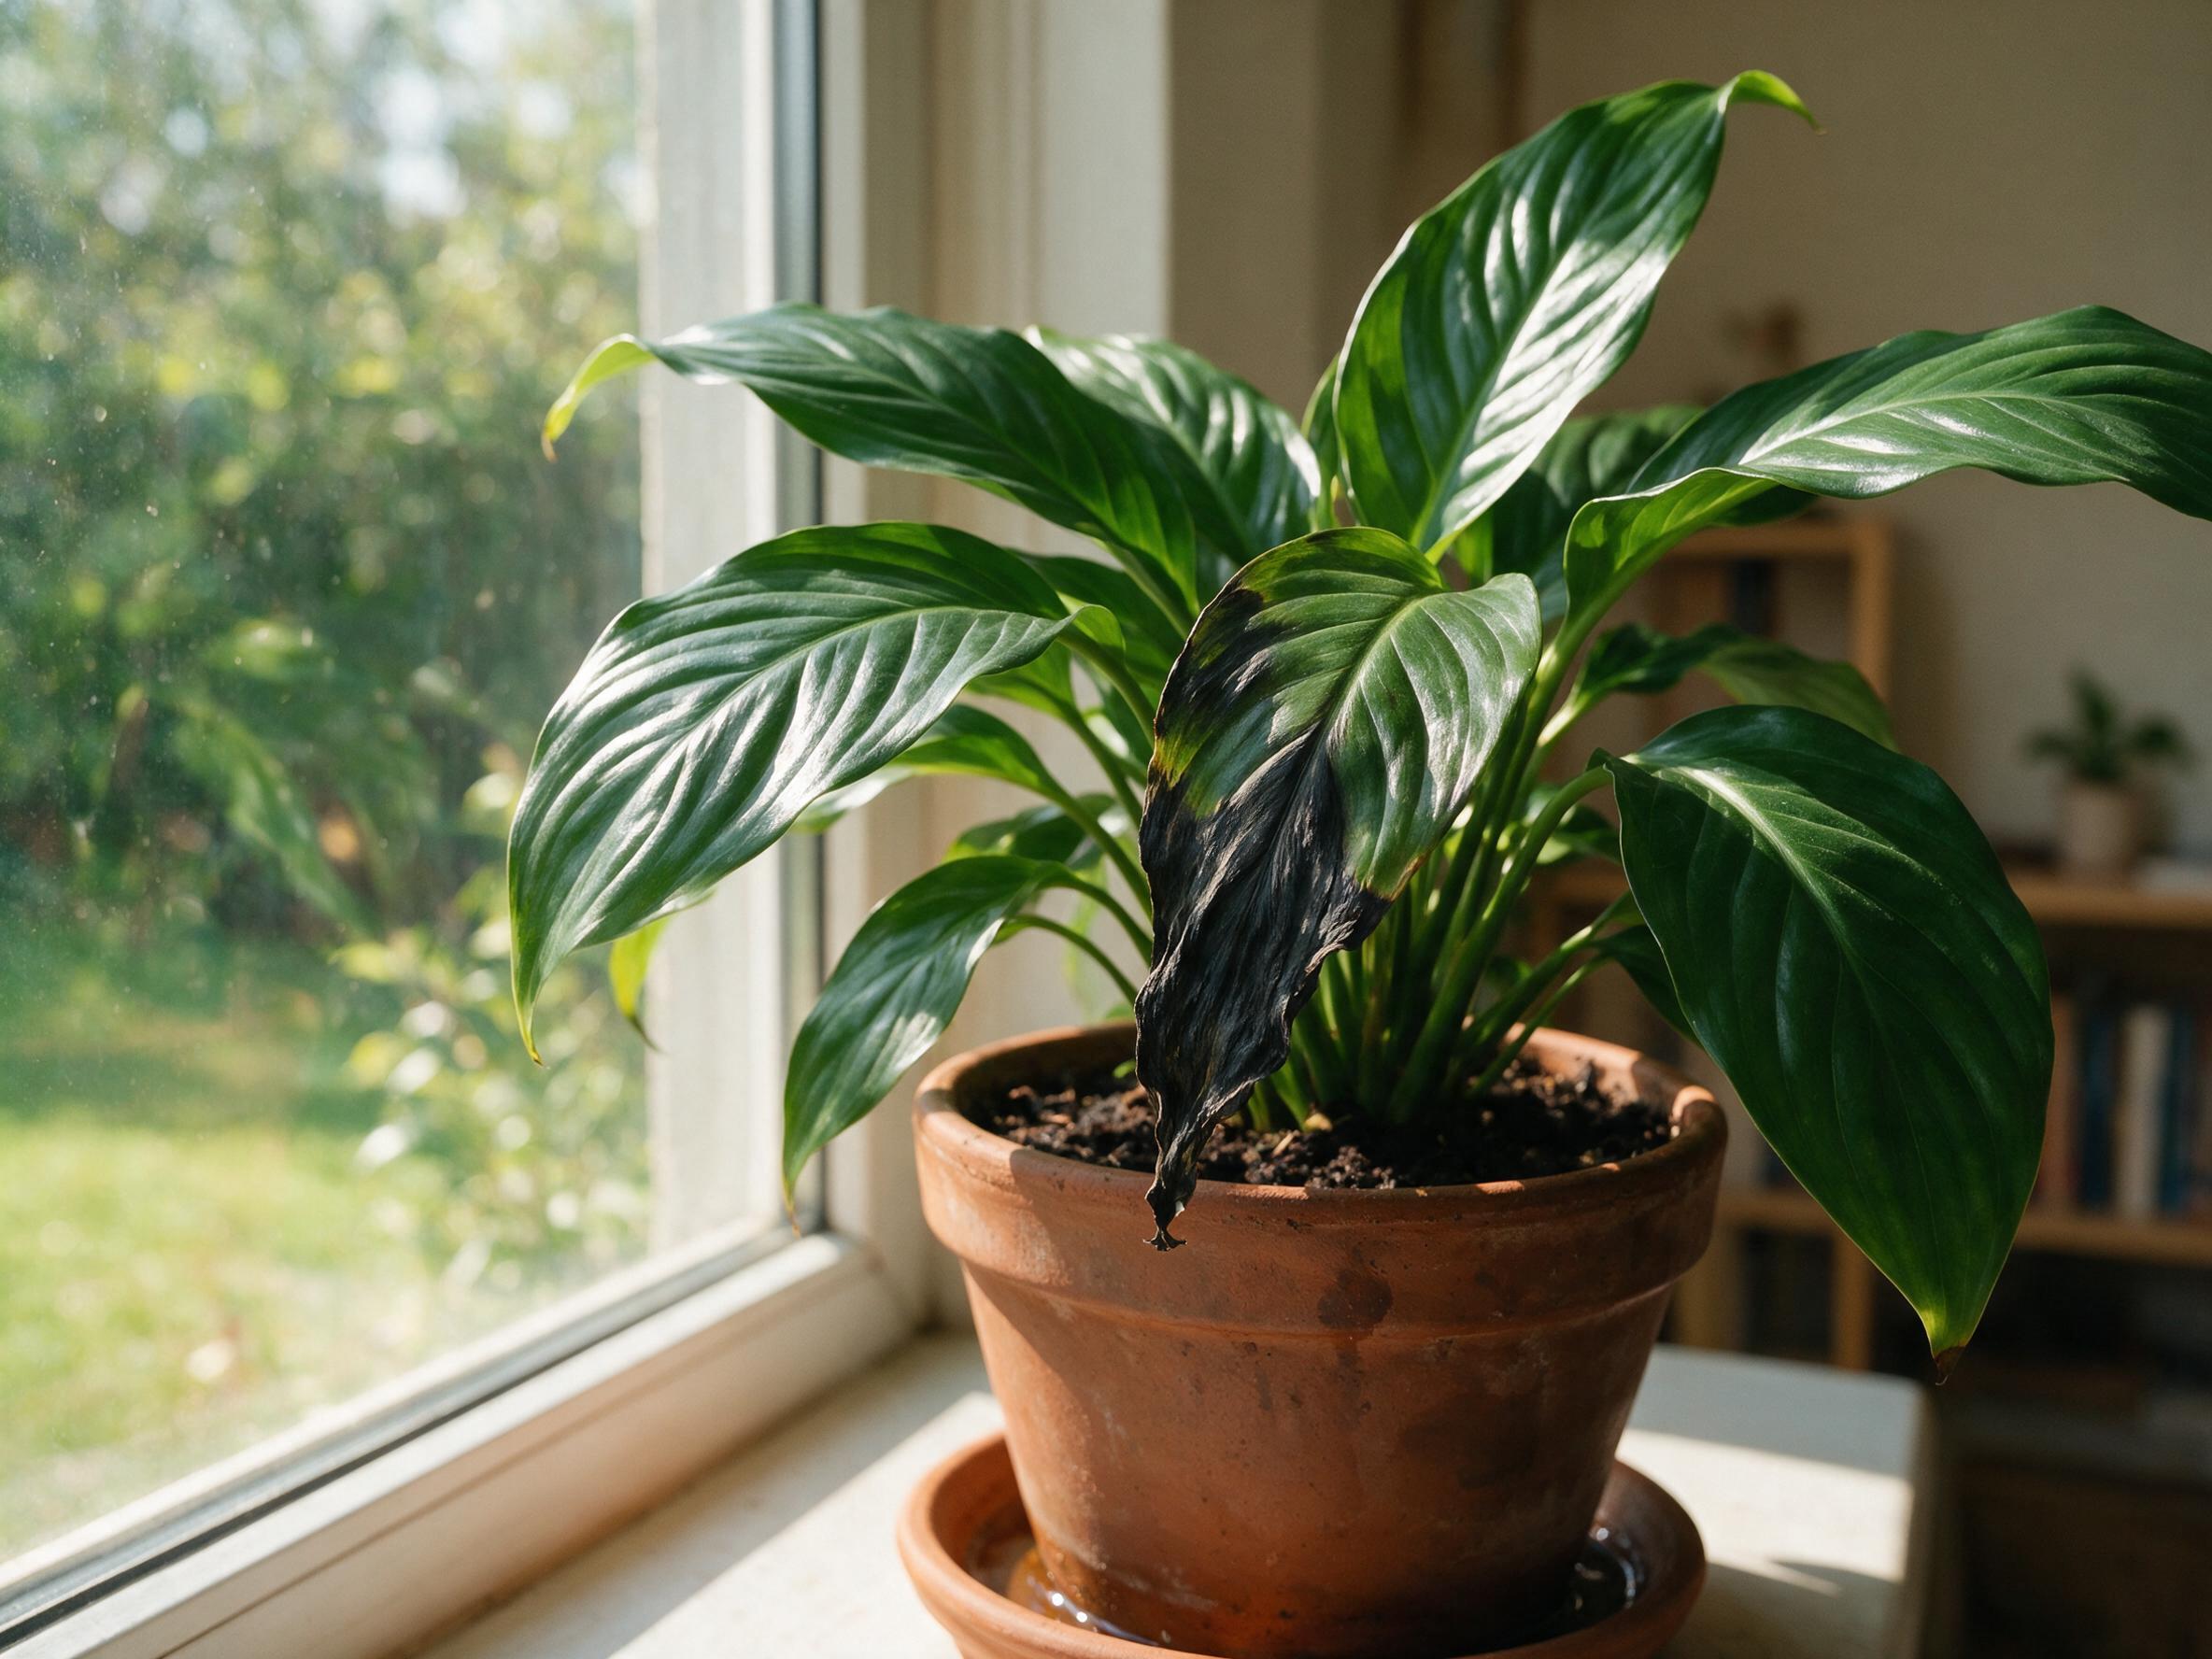
Few things stop a plant lover in their tracks like walking over to their peace lily and finding lush, dark green leaves that have turned black. It can feel alarming — and honestly, it should prompt action. Once tissue turns jet-black and brittle — or black and slimy — it cannot recover. Your goal is not to “cure” black leaves, but to halt the progression and protect healthy tissue.
The good news is that most peace lilies can recover if the underlying cause is corrected early. Removing damaged foliage, fixing watering habits, and providing proper light and humidity can encourage regrowth within a few weeks. This guide walks you through every possible cause of blackening, how to pinpoint which one you are dealing with, and exactly what to do about it.
Whether you picked up your plant at a local nursery, a big-box store, or inherited it from a friend, the troubleshooting process is the same. Read through each section below, and you will have a clear picture of what is going wrong — and how to fix it.
What Does It Mean When Your Peace Lily Is Turning Black?
The peace lily, or Spathiphyllum wallisii, is a well-loved indoor plant known for its striking deep green foliage and elegant, hooded white flowers. It is one of the most popular houseplants in the United States, found in homes, offices, and waiting rooms from coast to coast. When its leaves start turning black, that beauty disappears fast — and the color change is never cosmetic.
Peace lily leaves can sometimes turn black seemingly out of the blue. While it may at first look purely cosmetic, it is also a sign that something is wrong with how you are caring for your plant. Blackening is a visible endpoint of several distinct physiological processes. At the cellular level, the damage is real and permanent wherever it has already occurred.
Black leaves do not happen in a day. When you keep your plant in an unhealthy condition for a prolonged period, it shows signs indicating that it is suffering from severe issues. The location of the blackening — whether it starts at the tips, the edges, the base, or appears as scattered spots — gives you your first clue about the cause.
Pro Tip: Pay attention to where the blackening begins. Tips turning black first often point to water quality or fertilizer issues, while blackening that starts at the base and moves upward typically signals root rot from overwatering.
Is Blackening in a Peace Lily Always a Sign of a Problem?
Almost always, yes — but there is one exception worth knowing. Even aging leaves typically yellow before browning. Blackening is abnormal and indicates stress such as overwatering, cold exposure, or disease — not natural senescence. If a lower leaf yellows and eventually dies off, that is normal aging. If leaves are skipping yellow and going straight to black, something is wrong.
Natural aging and outgrowing the planter can also lead to black leaves on peace lilies, with experts recommending pruning older leaves and repotting the plant every one to two years. So while a single older leaf occasionally dying back is not cause for panic, widespread blackening across multiple leaves — especially newer ones — demands attention.
The short answer: treat any black leaf as a warning signal until you have ruled out all the common causes below. Catching problems early gives your plant the best chance of a full recovery. If you are new to houseplant care, checking out a guide to low-light houseplants can also help you understand baseline care needs for tropical indoor plants like this one.
Watering Issues Causing Peace Lily Blackening
The most common causes of black leaves on a peace lily include improper watering, plant experts share. Both too much and too little water can lead to blackening, though they do so through very different mechanisms — and the fixes are opposite, so getting the diagnosis right matters.
Overwatering
Peace lilies are very sensitive to overwatering, which is why it is important to let the top layer of soil dry out between waterings. “Overwatering is the number one cause of black leaves on a peace lily that I most frequently see,” says Ellie Longfellow Bilodeau, third-generation gardener at Longfellow’s Greenhouses.
Overwatering makes the soil soggy, and the roots remain wet. Due to an extended stay in water, the roots suffocate and rot. Unhealthy roots shut down their functioning system and die. The plants are then unable to get nutrients from dying roots. The result is leaves that turn black from the base upward, often with a mushy texture.
When soil remains saturated for more than 48 hours, beneficial microbes die off and opportunistic pathogens like Phytophthora parasitica proliferate. Infected roots turn brown-black, become soft and stringy, and fail to absorb water or nutrients. The plant responds by sacrificing leaves — starting with the oldest ones — manifesting as uniform blackening from the base upward, often accompanied by a faint sour odor from the pot.
Underwatering
Peace lilies can deal with a bit of neglect, but if you do not water them enough it will cause stress. If the soil is dry for too long, your peace lily will take moisture from its leaves and they will then turn brown or black, usually starting at the tips.
Signs that underwatering is the culprit include soil that has pulled away from the edges of the pot, curling or crispy leaf edges, and drooping that improves quickly after watering. Rehydrate slowly: add small amounts of water over time until the soil is moist again. Check the soil every three to four days and water when the soil feels dry to the touch.
Water Quality
Peace lilies are sensitive to chemicals, many of which are found in tap water — chlorine and fluoride, for example. When these chemicals build up in the soil, they can cause black spots on the leaves. This is a particularly common issue for US households in cities with heavily treated municipal water supplies.
Fluoride (common in municipal water and superphosphate fertilizers) accumulates in leaf tips, disrupting cell division and triggering programmed cell death. Chlorine, chloramine, sodium, and boron have similar effects. Blackened tips that follow a precise “V” shape along the midrib — especially on mature, otherwise healthy-looking leaves — are the hallmark of fluoride burn.
Use filtered water, distilled water, or collected rainwater to water your plants. If you want to use tap water, leave it out overnight for the chlorine, fluoride, and other impurities to evaporate or sink to the bottom of the container.
Pro Tip: A simple moisture meter (available at most US garden centers and hardware stores for under $15) takes the guesswork out of when to water. Stick it into the soil before every watering session and only water when the reading is in the “dry” zone.
Light Conditions Behind Peace Lily Blackening
Peace lilies prefer bright, indirect light. Direct sunlight can scorch the leaves, leading to blackening. Move your plant to a location with bright, filtered light. In most American homes, a spot a few feet back from an east- or north-facing window works well.
Peace lilies need indirect light, never direct light. If you position your plant a couple of feet from a window, it should be fine. Another alternative is to put it near fluorescent lights. This makes them excellent for offices and rooms without abundant natural light.
On the flip side, too little light slows the plant’s metabolism and keeps the soil wet longer between waterings. Peace lilies can survive low light, but low light can slow their growth. When a plant lives in low light, it reduces the rate of photosynthesis and its metabolism, which causes the soil to take longer to dry. Soggy soil damages the roots and is the main reason for pests and fungi.
Scorch damage from direct sun typically appears as bleached or tan patches that darken to black at the edges. If your plant sits in a south- or west-facing window with no curtain or shade, move it back or add a sheer curtain to diffuse the light. You can find more ideas for placing light-sensitive plants in our guide to the best houseplants for low-light areas.
Soil, Nutrients, and Root Health Causing Peace Lily Blackening
Poor Drainage and Soil Mix
Pots without drainage holes trap excess water, suffocating roots. This is one of the most common structural mistakes peace lily owners make. Even if you water correctly, a pot without drainage will drown your plant over time. The pot your peace lily is in needs to have enough drainage holes. If it does not, move it into one that does. Use a mix that drains well and contains peat moss, perlite, and maybe a little sand.
One often-forgotten cause of an overwatered peace lily is when your plant is in a pot that is way too big. The reason this is damaging is that the soil-to-root ratio is off and the soil absorbs a lot more water than when you use a smaller pot. This means the soil takes a lot longer to dry out, increasing the risk of root rot.
Over-Fertilization and Salt Buildup
If a peace lily is over-fertilized, an excess of salt may build up in the soil. Salt buildup clogs the soil, impeding the root system from absorbing adequate water. If the roots do not absorb water, they will not be able to absorb nutrients either. With the lack of absorption of specific nutrients such as magnesium, potassium, iron, and copper, the foliage will die because of necrosis. This is a primary reason for peace lily leaves to begin turning black, starting with the leaf tips.
A crusty white or tan film on the top of the soil is a telltale sign of salt buildup. Flush the soil by watering your peace lily and letting the excess water drain away — this helps wash the salts out with it. Feed every four to six weeks in the summer growing season using a balanced fertilizer. Fertilize once every six weeks during the growing season (spring through summer) with a balanced 20-20-20 formula diluted to half strength.
Root Rot
You are looking for root rot, which will translate to mushy, slimy roots that look black or brown instead of their usual healthy white or light green. If you get a foul smell, you can be sure that your peace lily is experiencing root rot. Root rot is the single most destructive condition a peace lily can face, and it almost always traces back to waterlogged soil.
Cylindrocladium root rot is a fungal infection caused by Cylindrocladium spathiphylli. Your houseplant can be vulnerable to this disease if it is overwatered or planted in soil that lacks adequate drainage. In warm, moist conditions, this fungus can destroy the entire root system in the space of a few weeks to a few months. It can be difficult to detect because the rot can progress for several weeks before the peace lily shows any symptoms on its leaves.
Important Note: Healthy peace lily roots are white or light green and firm to the touch. If you pull your plant from its pot and the roots are dark, soft, or smell sour, root rot is active and you need to act immediately.
Environmental Stress Triggering Peace Lily Blackening
Your home’s environment plays a bigger role in your peace lily’s health than most people realize. Peace lilies are tropical understory plants native to Colombia and Venezuela. They evolved in consistently warm, humid forests where temperatures never dip below 60°F (15.5°C). Replicating those conditions indoors — at least roughly — keeps the plant happy and black-leaf-free.
Cold Drafts and Temperature Swings
A peace lily will not survive exposure to frost, and cold damage can occur in temperatures below 45–50°F. Consistent exposure to cooler temperatures can damage a peace lily and lead to it turning black before eventually dying.
Exposure to temperatures at or below 55°F (13°C) for more than four to six hours triggers ice crystal formation inside leaf cells — even without frost — rupturing membranes and initiating rapid oxidation. This appears first as small, irregular black specks or streaks, often on newer leaves, and spreads quickly if cold persists.
In the US, the most common culprits are air conditioning vents blowing cold air directly onto the plant in summer, drafty single-pane windows in winter, and placing the plant near an exterior door. Place your peace lily in an area where there are no cold drafts, since they grow best between 65–80°F.
Low Humidity
Since peace lilies belong to tropical areas, they need high humidity to remain healthy. They cannot withstand dry air for prolonged periods. Maintaining humidity levels above 50% is essential for healthy peace lily foliage. In dry US climates — especially in winter when indoor heating drops humidity significantly — the leaf tips are the first to suffer, turning brown and eventually black.
To boost humidity around your plant, set it on a pebble tray filled with water, group it with other houseplants, or run a small humidifier nearby. Mist leaves regularly or use a humidifier to keep humidity above 50%. Avoid misting so heavily that water sits on the leaves for hours, as that can encourage fungal growth.
Pests and Disease Leading to Peace Lily Blackening
Common Pests
Another reason for black leaves on your peace lily might be unwanted guests like mealybugs, aphids, spider mites, and scale. These plants do not naturally get attacked by bugs, but if they have bugs, it means something is wrong. You might have kept the soil wet or kept it dry for a long time. These are all sap-sucking bugs that feed on the plant’s nutrients and leave the plant devoid of nutrients, causing black spots all over.
Check the undersides of leaves carefully — that is where most pests hide. Monitor the plant regularly for signs of pests such as spider mites, fungus gnats, aphids, and mealybugs. Treat infestations promptly with insecticidal soap or neem oil. Neem oil is widely available at US garden centers and big-box stores like Home Depot and Lowe’s. You can also use a plant identification app to help confirm what you are seeing on your plant’s leaves.
If you share your home with cats, keep in mind that peace lilies are toxic to pets. Our guide on keeping cats out of houseplants has practical tips for protecting both your plant and your furry companions.
Fungal and Bacterial Diseases
Blackening leaves on a peace lily can also be due to various fungal infections. These issues will most likely develop if the plant is exposed to conditions that encourage fungal growth, such as excessive moisture in the soil or poor air circulation.
Leaf spot, also known as Anthracnose, can cause dark spots on the leaves that turn black over time and can develop a yellow ring or halo around the spots. Anthracnose is best treated by removing affected leaves with clean garden tools. This will prevent the infection from spreading.
Many fungal infections can cause black leaves in peace lilies, including Cylindrocladium Root and Petiole Rot, Phytophthora Leaf Spot, and Leaf Blight Pythium Root Rot. Leaf Blight generally spreads due to the splashing of water. When your plant faces high moisture and high humidity together, it becomes ideal for the growth of this fungus. It slowly turns the leaves black if not treated immediately.
If not resolved immediately, these spots will only grow and spread until your entire plant is infected. Quarantine any infected plants and prune away problematic areas until spots stop forming.
How to Diagnose Why Your Peace Lily Is Turning Black
Before you start treating your plant, take a few minutes to play detective. The pattern and location of the blackening, combined with the condition of the soil and roots, will point you to the right cause. Use the table below as a quick reference.
| Symptom Pattern | Most Likely Cause | First Check |
|---|---|---|
| Black tips in a “V” shape on mature leaves | Fluoride/water quality toxicity | Water source; check for crusty soil film |
| Black starting at base, moving upward; mushy texture | Overwatering / root rot | Soil moisture; smell the pot; inspect roots |
| Black tips starting on new growth; irregular black specks | Cold damage / temperature shock | Proximity to vents, windows, or drafts |
| Black patches with yellow halo or ring | Anthracnose or fungal leaf spot | Check for poor airflow; inspect for mold |
| Black spots scattered; sticky residue or webbing visible | Pest infestation | Inspect leaf undersides with a magnifier |
| Black tips on all leaves; crusty white film on soil | Over-fertilization / salt buildup | Review fertilizer frequency and concentration |
| Black crispy tips starting on older leaves; dry, pulling soil | Underwatering or low humidity | Check soil moisture and room humidity level |
Once you have a likely cause in mind, do a physical inspection. Check the soil moisture by sticking your finger about an inch into the soil. If it feels dry, it is time to water your peace lily. If it feels moist, hold off on watering for a few more days. Then, if overwatering or root rot is suspected, remove the plant from its pot. Gently remove the plant from its pot — if roots are soft and dark instead of firm and white, root rot is likely present.
How to Fix a Peace Lily That Is Turning Black
The fix depends on your diagnosis, but the steps below cover the most common scenarios. Work through them in order of likelihood based on your diagnosis above.
- Remove all black leaves immediately. If some leaves on the peace lily have turned black, prune those leaves with sterilized scissors. This helps prevent fungus or bacteria and stops unnecessary transfer of nutrients to already affected leaves.
- Inspect the roots. Stop watering immediately if soil is soggy. Remove the plant from its pot and inspect roots. Trim dead or mushy roots with sterilized scissors. Repot in fresh, well-draining mix — use peat-based soil with perlite or orchid bark. Use a pot with drainage holes to prevent future issues.
- Fix your water source. Switch to filtered, distilled, or rainwater. If tap water is your only option, let it sit uncovered overnight before using it on your plant.
- Flush the soil if fertilizer buildup is suspected. After removing any black leaves, place your plant in a sink to start removing excess fertilizer, excess salts, and mineral deposits. Turn on the tap and allow the water to run through the soil bed for several seconds. Allow the water to drain out and take out the high amounts of fertilizer left over.
- Treat pests or fungal disease. Remove harmful pests with neem oil or insecticidal soap, repeating applications until they are completely gone. For fungal infections, remove affected leaves, improve airflow around the plant, and allow the soil to dry out more between waterings.
- Correct the environment. Place the plant in bright, indirect light and maintain temperatures between 65–80°F (18–27°C). Mist leaves regularly or use a humidifier to keep humidity above 50%. Water only when the top one to two inches of soil feel dry.
If there are still some healthy leaves and a section of the root system that has not rotted, it is absolutely possible to revive your overwatered peace lily. In fact, these plants are notorious for being quite dramatic and drooping down but can come back to life very quickly after the issue is fixed.
Pro Tip: After repotting, do not fertilize for at least six to eight weeks. Your plant needs time to settle into its new soil without the added stress of processing nutrients. Resume feeding with a diluted, balanced fertilizer once you see new healthy growth.
How to Prevent Peace Lily Blackening Going Forward
Prevention is far easier than recovery. Once you have fixed the current problem, a few consistent habits will keep your peace lily looking its best for years to come.
- Water on a need-based schedule, not a calendar schedule. Peace lilies do not require that much water and only need slightly moist soil to thrive. They are very sensitive to overwatering, which is why it is important to let the top layer of soil dry out between waterings.
- Always use a pot with drainage holes. One of the best ways to prevent root rot is to plant your peace lily in a container with adequate drainage holes. When watering, make sure water does not build up at the bottom of the container and instead allow it to drain from the pot.
- Right-size your pot. Pick an appropriately sized planter for your peace lily so it has enough room to grow and has proper drainage. Going too large causes the soil to stay wet too long.
- Keep it away from vents and drafts. Keep your peace lily away from cold windows or anywhere that gets cold drafts. In summer, the same applies to air conditioning vents blowing directly on the plant.
- Use quality water. Filtered, distilled, or overnight-rested tap water protects the leaves from chemical buildup over time.
- Fertilize lightly and infrequently. Applying fertilizer once a month during the growing season, watering when the top inch of soil dries out, and occasional repotting is just about all that is needed to keep them happy.
- Inspect regularly for pests. Remove all dead leaves from the plant and the pot. Wipe down green leaves with a damp cloth occasionally to remove dust. Check the plant’s leaves for pests like spider mites, mealybugs, and scale.
- Ensure good airflow. Ensuring your peace lily enjoys gentle, consistent air circulation promotes a healthy environment free from stagnant air. Good airflow helps to prevent the onset of fungal diseases, which thrive in still, humid conditions.
- Repot every one to two years. Fresh soil prevents salt buildup and gives roots room to grow. Repot your plant in a pot two to three inches larger than the current pot if it is rootbound. This way, your peace lily’s roots will have enough space to grow without poking through the pot’s drainage holes. When repotting, use high-quality potting soil that is airy and well-draining.
If you enjoy growing other tropical or low-maintenance plants alongside your peace lily, you might also enjoy exploring different types of plants that thrive in similar indoor conditions, or browsing different types of rubber plants and different types of aloe vera plants that make great companions.
FAQ
Can black peace lily leaves turn green again?
Once tissue turns jet-black and brittle — or black and slimy — it cannot recover. Your goal is not to “cure” black leaves, but to halt the progression and protect healthy tissue. Prune the black leaves off cleanly and focus your energy on fixing the underlying cause so new, healthy growth can emerge.
Why is my peace lily turning black after repotting?
Transplant shock is real. Misting, feeding, repotting, and moving plants around too much all cause distress to them and can cause black, yellow, or crispy leaves. Give your plant a few weeks to settle in after repotting, keep it in stable conditions, and hold off on fertilizing until you see new growth.
Should I cut off black peace lily leaves?
Yes — always. Trim away any blackened or damaged leaves with clean scissors or pruning shears. This will help the plant direct its energy toward healthier growth. Use sterilized tools to avoid introducing bacteria or fungal spores to the fresh cuts.
How often should I water my peace lily to prevent blackening?
There is no universal schedule that works for every home. Check soil moisture regularly by putting your finger in the soil and feeling how damp it is. You should only be watering when the top feels dry. In most US homes, that works out to roughly once a week in summer and every ten to fourteen days in winter.
Can too much fertilizer cause black leaves on a peace lily?
Too much fertilizer, primarily nitrogen, increases the soil’s acidity, causing a chemical imbalance that makes the roots fail to absorb minerals. Due to excess fertilizer, the root system gets burned, and the tips and edges of the leaves start turning black and slowly spread entirely. Always dilute fertilizer to half the recommended strength for peace lilies.
Why are only the tips of my peace lily turning black?
If blackening begins at the leaf tip and progresses inward along the midrib, suspect water quality first. Fluoride and chlorine in tap water are the most common culprits for tip-only blackening, especially when the rest of the leaf looks healthy. Switch to filtered or distilled water and the problem should stop progressing within a few weeks.
Is a peace lily with black leaves still safe for my home?
Yes, a struggling peace lily is not dangerous to humans. However, peace lilies are toxic to cats and dogs, so keep them out of reach of pets regardless of their health status. Our article on plants that repel cats has ideas for creating a pet-safe plant zone in your home. For help identifying what is affecting your plant visually, a plant identification app for Android can be a useful tool.