Why Are My Peace Lily Tips Brown? Causes, Fixes, and Prevention Tips

September 8, 2026
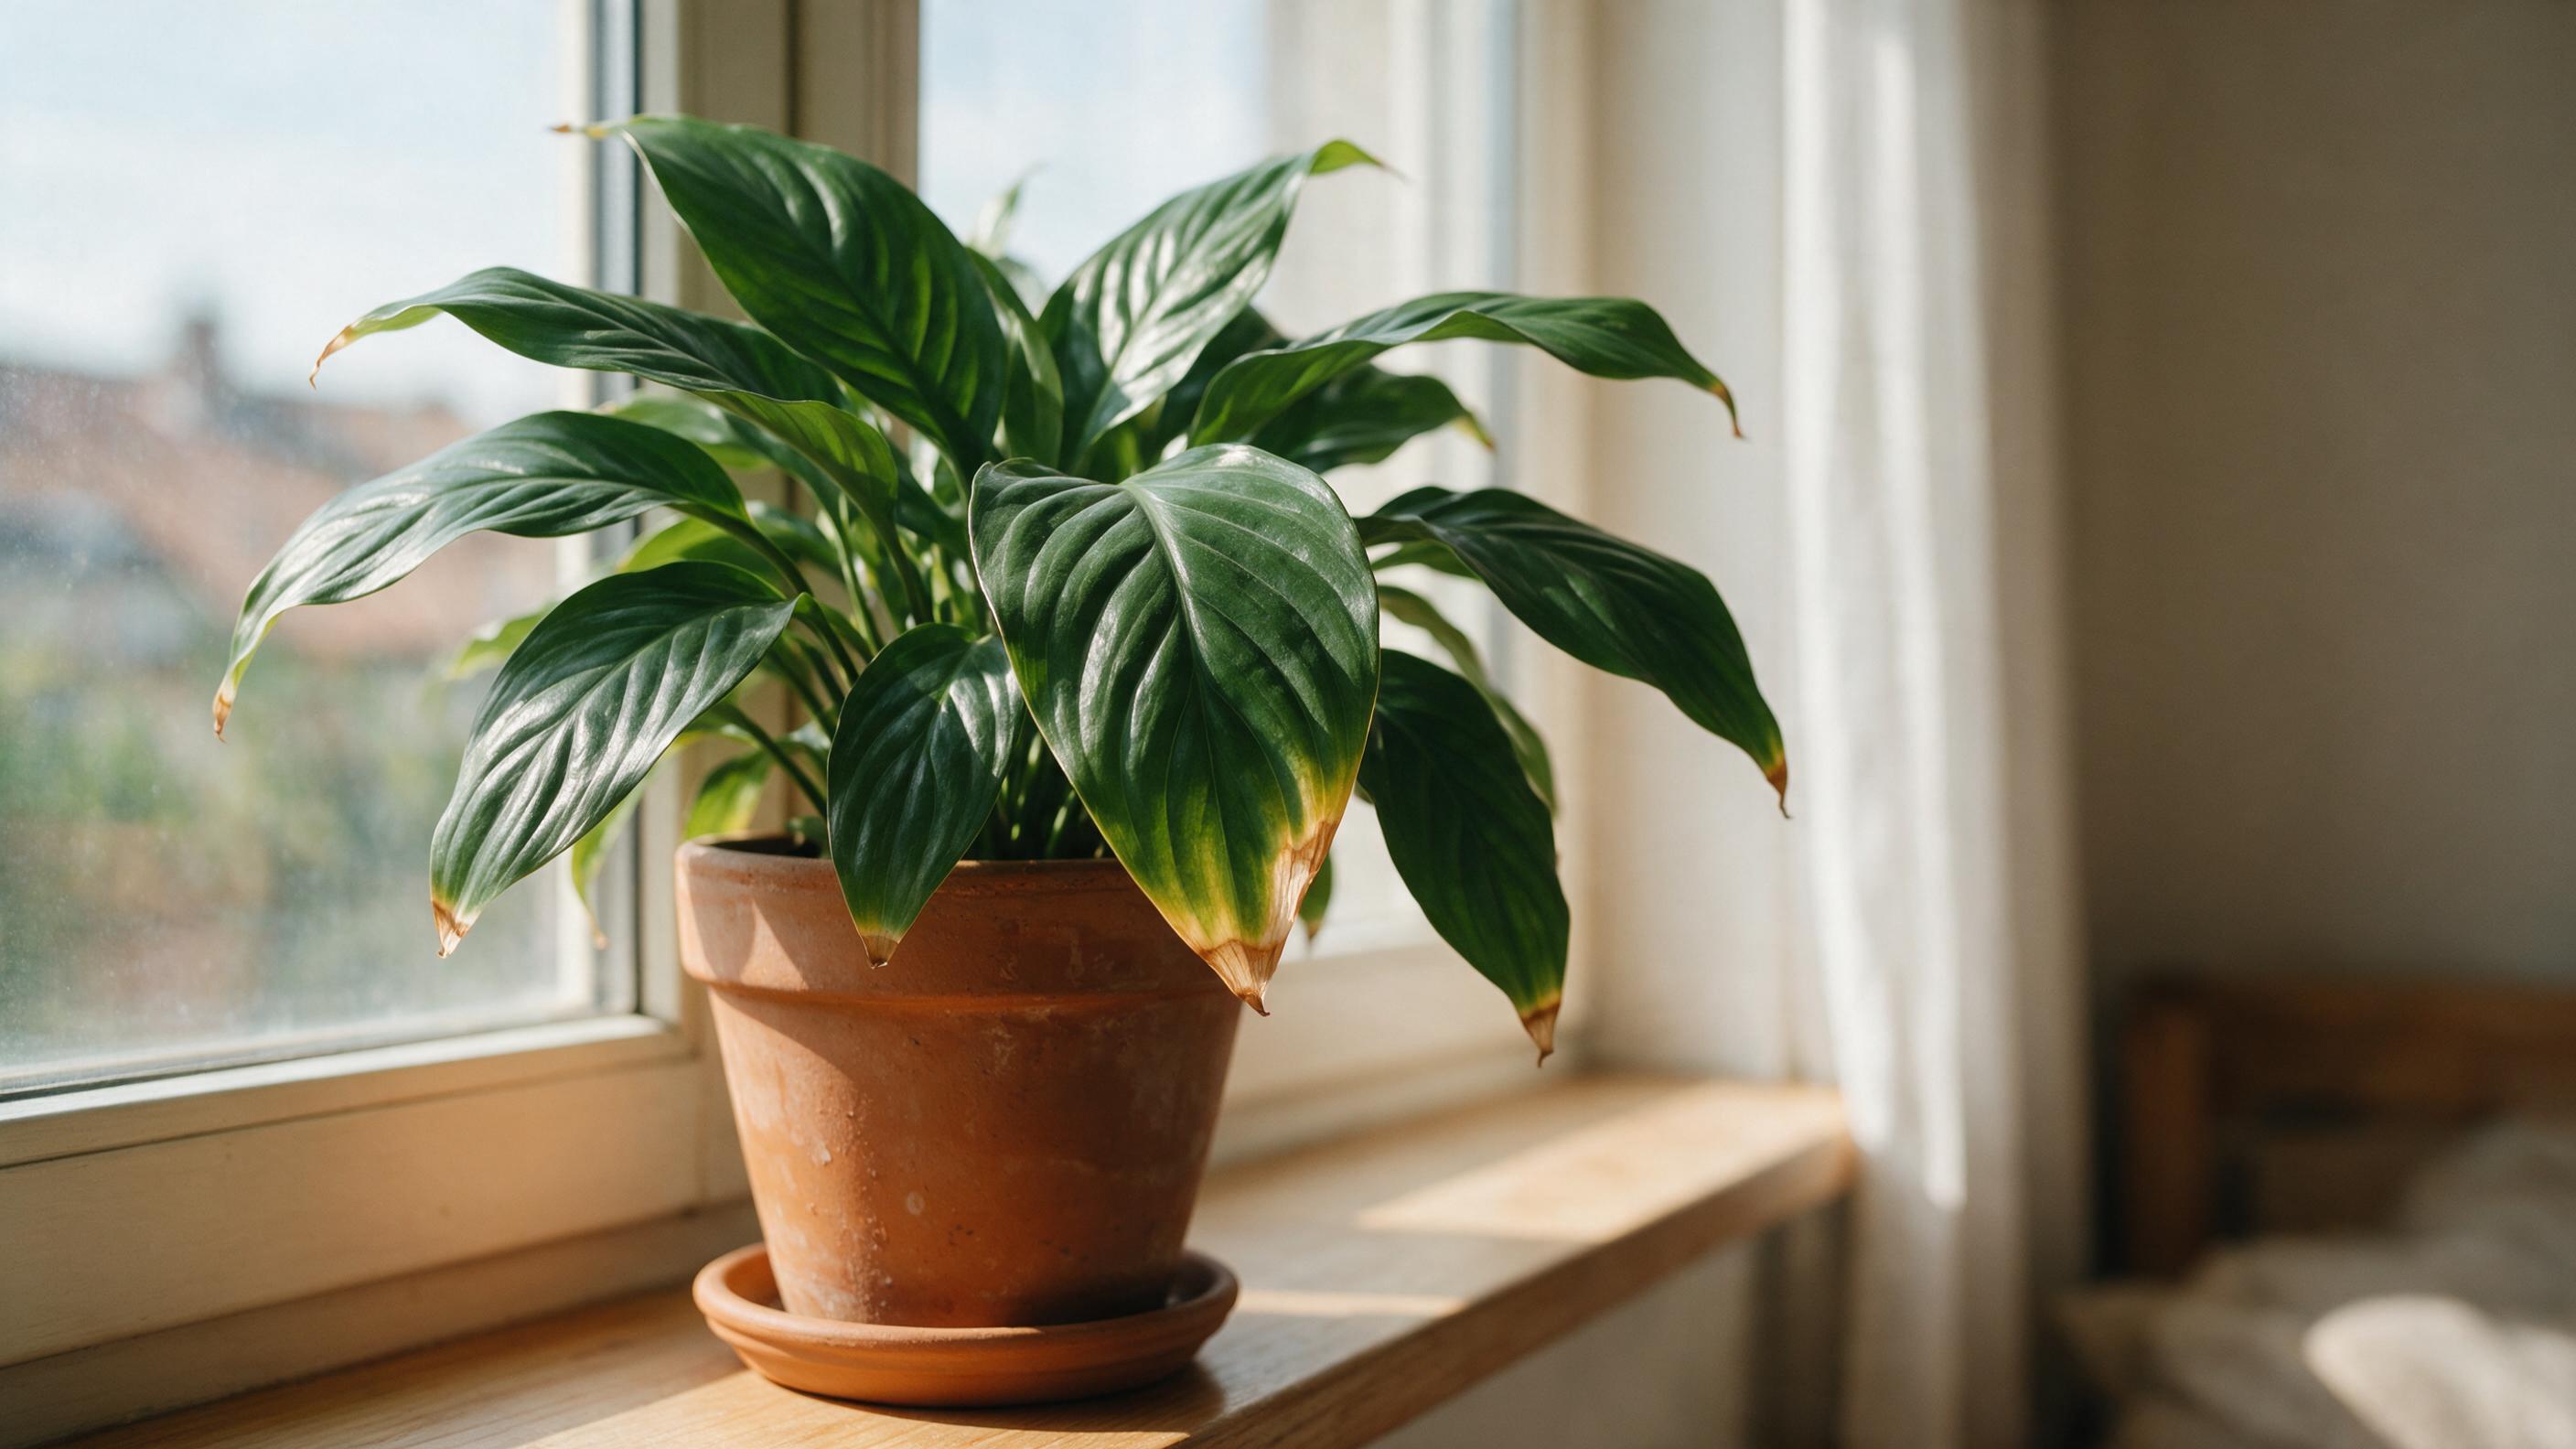
You notice it one morning — the glossy, dark green tips of your peace lily have turned papery and brown. The rest of the plant looks fine, but those crispy edges are hard to ignore. Before you assume the worst, take a breath: tip burn is one of the easiest issues to diagnose and fix.
Peace lilies are popular houseplants across the United States, prized for their ability to thrive in low-light rooms and their elegant white blooms. But their sensitivity to water quality, humidity, and soil conditions means that brown tips are a common complaint — even among attentive plant owners. The good news is that understanding the cause puts you back in control.
This guide walks you through every reason your peace lily’s tips might be turning brown, how to identify which one is affecting your plant, and exactly what to do about it — plus how to keep it from happening again.
What Does It Mean When Your Peace Lily Has Brown Tips?
Brown tips on a peace lily are the plant’s way of communicating stress. When leaf tips turn brown, your peace lily is telling you something about water, salts, humidity, or heat. The browning almost always starts at the very tip of the leaf and works inward, which is a helpful clue for diagnosis.
Peace lilies (Spathiphyllum wallisii) originate from tropical forest understories in Central and South America, where humidity is high, water is soft, and light is filtered through a canopy. When indoor conditions drift too far from that native environment, the leaf tips are the first place you’ll see the evidence.
The cause usually depends on where and how the browning appears. Different discoloration patterns signal different stress factors affecting your plant. Crispy brown tips that affect many leaves at once point toward humidity or water quality. Brown patches on one side of a leaf suggest too much direct sun. Soft, mushy browning accompanied by a bad smell usually means root rot from overwatering.
Pro Tip: Before changing anything about your care routine, take a close look at the pattern of browning. Tip color, texture (crispy vs. soft), and which leaves are affected will narrow down the cause quickly.
Is Brown Tipping in Peace Lilies Always a Sign of a Problem?
Not always. The age of your peace lily plays a role in understanding brown tips. As peace lilies age, it’s normal for older leaves to develop brown tips as part of the natural leaf aging process — this is a common occurrence and not necessarily a cause for concern.
Older leaves retire at the tips first. If only the oldest, lowest leaves show small brown tips and new growth is clean and glossy, natural aging is the likely explanation. In this case, you don’t need to change anything about your care routine.
However, while one or two brown leaves might simply mean natural aging, widespread browning across multiple leaves points to specific care issues you can correct. If you’re seeing brown tips spread across younger leaves or appearing on new growth as it unfurls, that’s a signal to investigate further. Check out our guide to the best houseplants for low-light areas if you’re also reconsidering whether a peace lily is the right fit for your space.
Watering Issues Causing Peace Lily Brown Tips
Water — how much you use, how often you apply it, and what’s in it — is the single biggest driver of brown tips on peace lilies. There are several distinct water-related causes, and they each look slightly different.
Overwatering
Overwatering is one of the most common causes of peace lily leaves turning brown, and it usually begins with hidden root stress. When a peace lily sits in constantly wet, poorly draining, or compacted potting soil, the roots cannot access oxygen. Without oxygen, roots begin to decay, and a rotting root system can’t deliver water evenly to the leaves — which leads to brown margins and tips.
Signs of overwatering include a heavy pot, soil that stays wet for days, a musty smell, and yellowing that may accompany the brown tips. If you recognize this pattern, let the top inch dry out, empty saucers, ensure drainage, and adjust your watering frequency seasonally.
Underwatering
Underwatering can cause the plant to become stressed, leading to dry, crisp, and drooping leaf tips. The pot feels feather-light, tips brown and edges curl, and the plant perks up after watering — that last clue is a reliable sign that moisture is the issue rather than something more serious.
A general guideline is to water peace lilies when the top two inches of soil feel dry to the touch. This usually translates to watering once a week, but it can vary. In warmer months or drier environments, peace lilies may require more frequent watering, possibly every four to five days. During cooler, less active growth periods in winter, the frequency might decrease to every ten to fourteen days.
Tap Water Chemicals
This is the most overlooked cause of brown tips — and the one most people never suspect. Fluoride and chlorine in tap water accumulate in peace lily leaf tips over time, causing the distinctive brown discoloration that ruins the plant’s appearance. These chemicals don’t flush out through normal watering; they build up progressively until visible damage appears. Peace lilies are particularly sensitive to these additives compared to other houseplants.
Most US municipal water is fluoridated at around 1 part per million — a level safe for humans but problematic for peace lilies. As a monocot, peace lily belongs to a plant group with documented sensitivity to fluoride, alongside spider plants, dracaena, and lilies. Fluoride moves through the plant via the transpiration stream — the continuous flow of water drawn up through roots and released through leaf pores. Because this flow ends at the leaf tips, fluoride concentrates there.
Standard carbon filters like Brita remove chlorine effectively but don’t eliminate fluoride. For complete fluoride removal, you need reverse osmosis filtration or distilled water. Rainwater collected in clean containers works perfectly and costs nothing.
Pro Tip: If you have a dehumidifier at home, you can repurpose the collected water for your plants. It’s not distilled, but it won’t have the fluoride and chlorine that cause dry, brown tips.
Inconsistent Watering
If your peace lily started browning after inconsistent watering, the issue may be a moisture imbalance. When soil stays dry for too long and is then heavily watered, the sudden moisture change shocks the plant. As a result, you may notice brown edges, slight wilting, curling, or drooping along with dry, crispy tips.
The fix is straightforward: establish a steady rhythm — water when the top inch is dry, then drain fully. Consistency matters more than the exact schedule.
Light Conditions Behind Peace Lily Brown Tips
Peace lilies are famously tolerant of low light, but light that’s too intense — or too dim for too long — can still cause brown tips and leaf damage.
Direct sunlight can cause sun scorch, evident by brown and dry leaf tips. Peace lilies prefer bright indirect light, not direct sun exposure. Too much direct sunlight or positioning too close to grow lights causes brown, burned patches on leaves. Move your peace lily to the middle of a room or a spot where it receives filtered light rather than direct sun rays.
On the other end of the spectrum, if your peace lily is not getting enough light or has been moved to a new location, it may need more time to adjust and adapt to its new surroundings. A north-facing window or a dim hallway can leave the plant struggling to photosynthesize effectively, which over time weakens leaf tissue and contributes to browning. For rooms with challenging light, you might also explore our list of types of plants suited to a range of indoor conditions.
The sweet spot for peace lilies is a bright room with no direct sun hitting the leaves — think a few feet back from an east- or north-facing window, or near a south or west window with a sheer curtain.
Soil, Nutrients, and Root Health Causing Peace Lily Brown Tips
What’s happening underground has a direct impact on what you see at the leaf tips. Poor soil, salt buildup from fertilizer, and root-bound conditions are all common contributors to browning.
Fertilizer Salt Buildup
Among the factors that lead to abiotic disorders in houseplants, excess fertilizer ranks high. The idea that “if a little is good, more is better” certainly does not apply to fertilizing plants, especially those growing indoors. Excess fertilizer can cause browning leaves in peace lilies. When you fertilize plants, the fertilizer salts are taken up by the plant and stored along leaf margins and tips.
If you want to promote blooming in your peace lily, start fertilizing every six weeks as winter concludes. Be mindful of the quantity you apply — rather than using a full dose, it’s advisable to limit it to half the suggested amount. A better way to keep unwanted mineral deposits from impacting your plant is to leach it two or three times per year or whenever you notice white mineral buildup on the soil. Do this by flushing the plant with three times the volume of water as the volume of soil in the pot. Let the plant drain completely.
Poor Drainage and Compacted Soil
If your peace lily leaves are turning brown despite careful watering, poor drainage could be the hidden cause. When drainage holes are blocked or the potting mix becomes dense and compacted, excess moisture gets trapped in the container. As a result, the plant struggles to regulate water properly, and you may notice yellowing, brown tips, or a stale soil smell.
Repotting into a mix of two parts houseplant mix, one part fine bark, and one part perlite or pumice gives roots the aeration and drainage they need. Peace lilies planted in containers without drainage holes will quickly deteriorate. This can also occur if you’ve used a decorative cover pot without drainage holes, or even if you leave the plant in a drip tray without removing excess moisture at the base. Always make sure to plant or repot your peace lily into a container with drainage holes.
Root-Bound Conditions
As your plant grows, its roots can outgrow the container and become tightly packed. When a peace lily becomes root-bound, it struggles to absorb water evenly, even if you’re watering correctly. As a result, you may notice dry tips or light browning along the leaf edges.
Repot into a container one to two inches larger using fresh, well-draining potting mix to give the roots more space to spread. Providing extra room helps restore proper moisture absorption and supports healthier leaf growth. Plan to repot roughly every two years, or sooner if roots are visibly circling the bottom of the pot.
Environmental Stress Triggering Peace Lily Brown Tips
Even when watering and light are dialed in, the broader environment in your home can still push a peace lily toward brown tips. Humidity and temperature are the two biggest environmental factors to watch.
Low Humidity
Peace lily evolved in tropical forest understory where relative humidity rarely drops below 60%. The average US home in winter sits between 30 and 40% — well below what this plant is adapted for. When air humidity falls below 40%, water evaporates from leaf surfaces faster than roots can replace it. The tips are the furthest point from the root supply: they lose turgor pressure first, and the cells there dehydrate and die.
In winter or AC season, indoor air often drops under 30% RH — prime tip-scorch territory. Brown, papery tips and edges appear worst on leaves farthest from the soil line. Peace lilies prefer humidity levels between 40 and 60%.
To raise humidity around your plant, you have several options:
- A pebble tray — a wide saucer filled with gravel and water kept below the drainage holes — provides slow, passive evaporation.
- A small humidifier near the plant is the most reliable option for persistent winter dryness.
- Grouping plants together raises local humidity through shared transpiration.
- Misting leaves is the least effective method: droplets evaporate too quickly to raise ambient humidity in any meaningful way.
Temperature Extremes and Drafts
Peace lilies thrive in stable environments. They prefer temperatures between 60 and 85°F. Temperatures consistently above 80°F or below 65°F can stress the plant, causing brown leaf tips.
The RHS specifically notes that peace lilies placed near radiators or heating vents are prone to brown edges. Cold drafts from air conditioning vents, open windows, or exterior doors in winter can cause sudden temperature drops that damage leaf tissue in the same way. Keep your peace lily away from vents, exterior walls, and frequently opened doors.
Pests and Disease Leading to Peace Lily Brown Tips
Peace lilies aren’t particularly pest-prone, but stress from overwatering, low humidity, or poor light lowers their resistance and makes them more attractive to pests. When pests are the cause of browning, you’ll usually find other telltale signs alongside the discolored tips.
Spider Mites
Spider mites are nearly invisible individually, but their damage is unmistakable. Look for fine, silvery webbing stretched across leaf undersides and between stems, accompanied by a stippled or dusty appearance on the upper leaf surface where individual cells have been punctured and emptied. Leaves may also take on a slightly bronze or grey cast in heavy infestations. Spider mites thrive in warm, dry conditions, which is why they’re most common in winter when central heating is running and humidity is at its lowest.
Treatment: spray the entire plant — including leaf undersides — with insecticidal soap or diluted neem oil. Repeat every five to seven days for at least three treatment cycles to catch eggs that hatch between applications.
Mealybugs
Mealybugs are among the more distinctive pests — the fluffy, white, cotton-like tufts they produce at leaf junctions, stem bases, and leaf axils are hard to mistake for anything else. The insects themselves are small (two to four mm), soft-bodied, and oval, usually surrounded by a waxy white coating. They feed by sucking sap from the plant, which weakens growth, causes leaves to yellow and distort, and produces a sticky substance called honeydew that can encourage sooty mould to develop.
For isolated infestations, remove mealybugs by dabbing them with a cotton swab dipped in rubbing alcohol. Insecticidal soaps or neem oil sprays can also be used as a treatment. Check neighboring houseplants as well — if left untreated, mealybugs can spread to other indoor plants.
Root Rot Disease
The two most common diseases in peace lilies are Cylindrocladium spathiphylli and Phytophthora parasitica, both causing root rot diseases. The former type of root rot is transferred among plants by infected water; the second by infected soil. You’ll recognize root rot in your peace lily if you notice yellowing leaves and a wilting appearance. In severe cases, the leaves and petioles may also have dark brown spots, particularly on the lower portions of the petioles. By the time you notice this discoloration, the roots are likely severely rotten.
If root rot is advanced, repot the peace lily in clean soil and a fresh pot. If the rot has spread throughout the root system, the plant may not be salvageable, and the soil and pot should be discarded or sterilized before reuse. Our guide on the best iPhone apps for identifying plants can also help you cross-reference symptoms if you’re unsure what you’re dealing with.
How to Diagnose Why Your Peace Lily Has Brown Tips
Working through a quick checklist before making any changes will save you from accidentally making the problem worse. Six causes produce brown tips on peace lilies, but each leaves a different fingerprint. Before changing anything, check two things: the pattern of browning on the tip, and the condition of the roots.
Use this diagnostic table to identify your most likely cause:
| What You See | Other Clues | Most Likely Cause |
|---|---|---|
| Crispy brown tips, papery texture | Affects many leaves at once; worse in winter | Low humidity |
| Brown tips + white crust on soil or pot rim | Plant improves with filtered water | Tap water minerals / fluoride |
| Brown tips, pot feels very light | Leaves curl; plant perks up after watering | Underwatering |
| Brown tips + musty smell | Heavy pot; soil stays wet for days; yellowing | Overwatering / root rot |
| Brown patches on one side of leaf | Worst on leaves facing a window | Direct sun / heat scorch |
| Brown tips + sticky residue or webbing | Tiny bugs visible under leaves | Pests (mealybugs or spider mites) |
| Only oldest, lowest leaves affected | New growth is clean and green | Natural leaf aging |
Once you’ve identified the pattern, confirm by checking one more variable: the cause usually depends on where and how the browning appears, because different discoloration patterns signal different stress factors. You can also use a visual triage guide from Blooming Expert to cross-check your diagnosis against root condition.
How to Fix a Peace Lily That Has Brown Tips
Once you know the cause, the fixes are straightforward. Work through the relevant steps below based on your diagnosis. Keep in mind that damaged tissue won’t re-green. Focus on prevention: better water quality, steady moisture, moderate humidity, and gentle feeding. The goal is to stop new browning, not reverse what’s already there.
Step 1: Trim the Brown Tips
Start by cleaning up the visible damage. Use clean scissors and follow the natural outline of the leaf, trimming only the brown portion. This doesn’t harm the plant and improves appearance immediately. Only trim brown, crispy tissue — don’t cut into healthy green parts of the leaf. If more than half a leaf is brown, consider removing the entire leaf at its base to let the plant focus energy on healthy foliage.
Step 2: Switch Your Water Source
If tap water is a likely contributor — which it is in most US homes — use distilled, filtered, or collected rainwater to water your peace lily. Another option is to let tap water sit out overnight to let any unwanted chemicals, like chlorine, evaporate — though note this does not remove fluoride. For complete fluoride removal, distilled or reverse osmosis water is more reliable.
Step 3: Flush the Soil
Even after switching to pure water, fluoride already in the soil will continue affecting your plant. Flush the soil every few months by running distilled or filtered water through the pot until it drains freely from the bottom. This helps remove accumulated salts and chemicals. Do this in a sink or bathtub where excess water can drain away. Use two to three times the pot’s volume in water.
Step 4: Raise Humidity
If low humidity is confirmed, set up a pebble tray beneath the pot and consider placing a small humidifier nearby. Target 50 to 65% relative humidity around the plant. A digital hygrometer (widely available for under $20 at most US hardware and home goods stores) takes the guesswork out of monitoring your indoor air.
Step 5: Adjust Watering and Soil
Water when the top inch of soil feels dry but before the entire pot dries out completely. The soil should stay consistently moist — not wet or soggy, but never completely dry. If your current potting mix drains poorly, repot into two parts houseplant mix, one part fine bark, and one part perlite or pumice.
Step 6: Treat Pests If Present
For spider mites or mealybugs, wipe with alcohol swabs and treat with insecticidal soap or neem oil weekly until clear. Improve airflow and avoid overhead watering. Repeat treatments are necessary to break pest life cycles. You can also find helpful identification support through the best Android apps for identifying plants if you’re not sure what pest you’re dealing with.
How to Prevent Peace Lily Brown Tips Going Forward
Prevention is easier than treatment. Once you’ve corrected the immediate problem, a few consistent habits will keep your peace lily’s tips clean and green for the long term.
- Use the right water every time. If you’ve been using tap or softened water, make the change immediately. Use distilled, filtered, or rainwater to prevent mineral buildup.
- Flush the soil regularly. Every two to three months during active growth, or anytime you notice white crust on the soil or pot rim, flush with two to three times the pot’s volume of clean water.
- Fertilize lightly and only during the growing season. During the winter months when days are short and light is poor, most houseplants produce little, if any, new growth. Attempting to encourage new growth by applying fertilizer then is counterproductive.
- Monitor humidity year-round. Humidity problems are worst in winter and AC-cooled rooms — raise relative humidity to 40–60%.
- Keep the plant away from vents and drafts. Forced-air heating and air conditioning vents dry out the air rapidly and cause temperature fluctuations that stress leaf tissue.
- Repot on schedule. Repot your plant once every two years, unless brown leaves are caused by root rot. Fresh soil resets salt buildup and gives roots room to grow.
- Inspect leaves regularly. Pests tend to hide in specific areas of your peace lily, so conduct a thorough inspection to catch them early. Start by examining the undersides of the leaves.
If you enjoy growing peace lilies alongside other houseplants, pairing them with other low-maintenance varieties can also help raise local humidity through shared transpiration. Browse our roundup of types of spider plants, different types of rubber plants, and different types of aloe vera plants for compatible companions. If you have pets at home, it’s also worth knowing how to keep cats out of houseplants, since peace lilies can be toxic to cats and dogs when ingested.
Key Insight: The single most impactful change most US peace lily owners can make is switching away from fluoridated municipal tap water. Peace lilies are marketed as easy, beginner-friendly houseplants that tolerate neglect. While this is partly true, their sensitivity to tap water chemicals isn’t widely known. Making that one switch resolves or prevents the majority of chronic brown-tip problems.
FAQ
Should I cut the brown tips off my peace lily?
Yes, you should cut brown leaves off a peace lily plant. Brown leaves could be a sign of age, pests, poor nutrition, or other problems. Removing them will help prevent energy waste and will rejuvenate your plant. Use clean, sharp scissors and follow the natural curve of the leaf so the trim looks natural.
Will the brown tips turn green again?
No. Damaged tissue won’t re-green. Focus on prevention: better water quality, steady moisture, moderate humidity, and gentle feeding. Once you address the underlying cause, new leaves will emerge healthy and green.
Can I use tap water if I let it sit overnight?
Letting water sit overnight may dissipate chlorine, but it won’t remove fluoride, hard-water minerals, or chloramine, which is used by many utilities. Use distilled, reverse osmosis, or rainwater instead for the best results with a fluoride-sensitive plant like a peace lily.
How often should I water my peace lily?
A general guideline is to water peace lilies when the top two inches of soil feel dry to the touch. This usually translates to watering once a week, but it can vary depending on the season, pot size, and how dry your home is. Always check the soil rather than watering on a fixed schedule.
Why does my peace lily get brown tips even though I water it correctly?
Most peace lily brown tips have nothing to do with how often you water — and different causes need entirely different fixes. If your watering is dialed in, check your water source for fluoride and chlorine, assess your indoor humidity level, and look closely at the leaf undersides for signs of pests. One of those three factors is almost always responsible when watering alone doesn’t solve the problem.
Is a peace lily with brown tips dying?
If you’re dealing with peace lily brown leaves, it’s easy to assume your plant is dying. However, peace lily leaves turning brown is usually linked to simple care mistakes rather than permanent damage. Address the root cause, trim the affected leaves, and your plant will produce fresh, healthy growth in the weeks ahead.