When it’s a weekend or holiday, the kids love to play with their friends at home or watch TV.
Sometimes the mother worries about the activities their kids engage in while playing.
It is not bad because every parent should want their child to have fun in ways that help them learn and are not harmful.
With the number of plastic bottles littering our homes and streets around the world, it would be nice to teach our kids how to make the world less littered by putting these bottles to use.
Besides, Children are never too tired to get creative with their parents and learn fun things also.
Every time a child does something new and unique, they can’t wait to share it with friends at school.
That’s one reason why you should try out these plastic bottle DIY projects with your child or children this weekend!
Piggy Bank
Did I hear you say yay!? I know. Every kid needs to cultivate a saving habit so that they grow with it.
What better way can you teach your child to save every little cent than having them create their piggy bank?
This project is easy and makes a perfect birthday party takeaway gift for your child’s friends.
Materials Needed
- One empty plastic water bottle
- Sheets of colored paper (optional)
- Sticky googly eyes
- One pipe cleaner
- Eight colored wooden beads
- A pair of scissors
- Glue gun
How to Make Plastic Bottle Piggy Bank?
Step 1
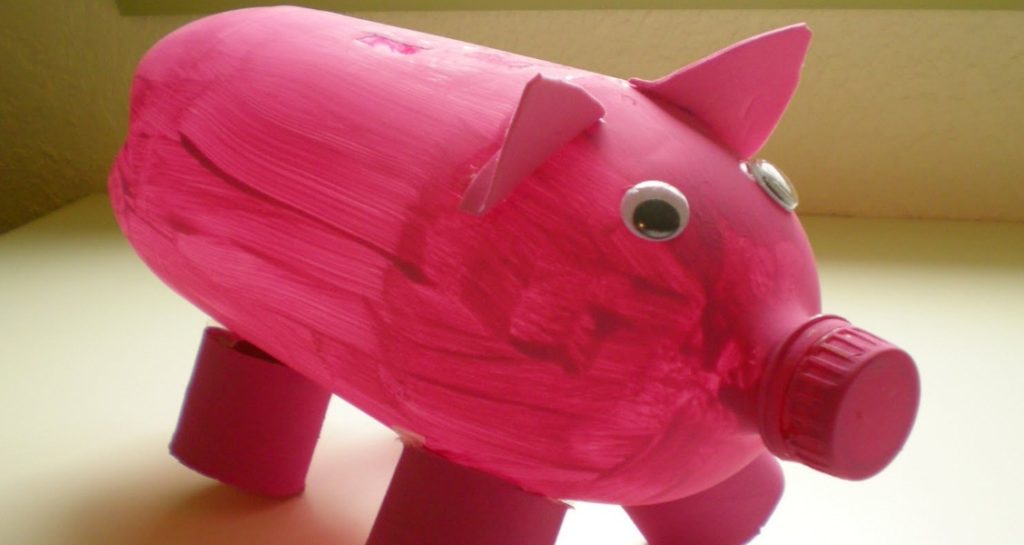
Make sure to use short plastic water bottles so your pig doesn’t look long and funny. Cut a slit of two inches long and about half an inch wide.
Make sure that the length of the slit runs the same way as the extended length of the bottle.
Step 2
If you want your piggy bank transparent so you can see every cent you put in it, you don’t need to do this step.
But if you want it to look beautiful and colorful, get a colored sheet of paper (preferably pink, but the choice is yours) that is wide enough to go around the bottle the same way the water companies wrap around the bottles with their nylons.
Wrap around the bottle with your colored paper and apply some glue so it can stick to the container.
Once the paper is stuck, cut out the extra paper covering the opening you cut on the bottle because that’s where you would be slipping the money through.
Make sure that once you are done, the opening you made will be on top of your pig.
Step 3
Cut out a round piece of paper of the same color as your pig’s body and stick it to the top of your plastic bottle cap.
Get a black crayon or marker and paint two cute little nostrils on the piece of paper (our pig needs to breathe). Once that’s done, screw the cap back onto the bottle.
Now, our pig needs some ears, so you will have to cut two beautiful tiny pig ears out of the same paper and glue them on the paper you already wrapped around your bottle close to the spout part.
Our pig also needs to see, so it’s time to stick on the googly eyes.
If you do not have stick-on eyes, you can get a piece of white paper, cut out two small circles, and put a black dot in the middle of both circles with a marker. Once you have your paper pig eyes ready, stick them on.
Step 4
Turn your bottle upside down and glue on four colored beads to form legs for your piggy bank.
Ensure they are wide apart but not too broad so your pig can stand balanced.
Step 5
Every pig has a tail, so we are giving this pig a spiral tail. Get a piece of pipe cleaner, twist it into a spiral (you can use a cocktail straw), and glue it to the back end of the bottle.
Now that the bank is ready, it is time to give a kid a few cents to start the savings journey.
A Nightlight
How about you make a new nightlight for your kid’s bedroom? There are different ways to make your child want to go to bed when it’s bedtime instead of wanting to watch TV (That might not be so true, but you get the point), and having them make their bedroom night light is a great idea.
Supplies
- A thick plastic bottle (preferably a honey bear bottle or any uniquely shaped bottle)
- A white compact fluorescent light bulb (5 watts warm)
- A cutter or an Exacto knife
- White spray paint
- Light bulb cord
- Sandpaper
How to Make a Plastic Bottle Lamp?
If you use a plastic honey bear bottle, ensure it’s clean and dry before you begin. The same goes for other containers.
Step 1
Cut open the bottom area of the plastic bottle carefully and remove the bottle cap from the top.
Thick bottles are usually harder to cut compared to pet bottles, so you need to be patient and extra careful.
If you notice any rough edges after you cut, use sandpaper to smoothen it out and proceed.
Step 2
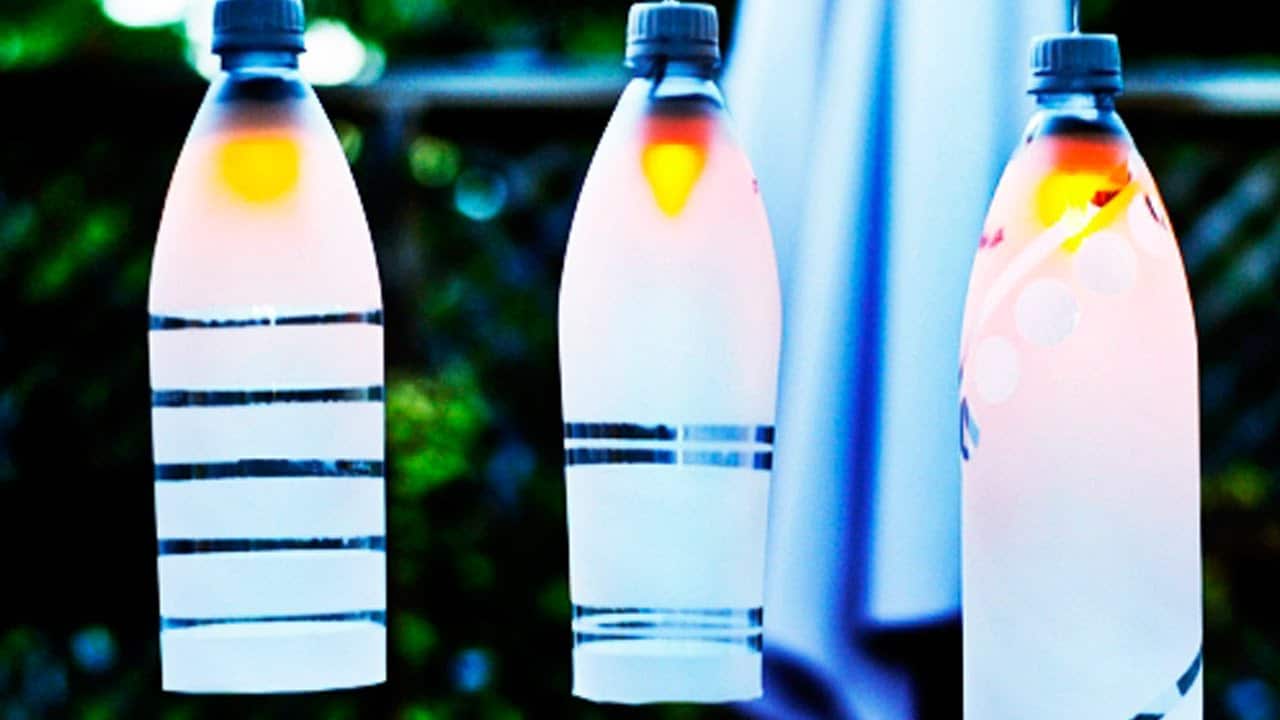
Get white spray paint and color the bottle you already cut. Let dry completely before you go further.
If you are using a honey bear bottle or any other cute-shaped bottle, you do not need to put on unique designs.
But its ok if all you have is a regular thick plastic bottle, you have to get some other bright and beautiful watercolour paint and draw some stars on the already painted white bottle. Your kid would love the effect at night.
Step 3
Once your bottle is dry, plug the light bulb underneath it. The result is expected to be beautiful.
Do not worry about your plastic bottle getting melted by the heat, that’s why the top of the bottle is open.
Beach Bucket
A plastic bottle beach bucket may sound like an excellent idea, but you would want to ask what kind of plastic bottle would do.
Don’t worry about why you have your empty laundry detergent bottles.
Supplies
- Empty detergent bottles
- A cutter knifes
- Sandpaper
Procedure
Wash your empty detergent bottle and cut open the bottom part. The handle of your detergent bottle becomes your child’s beach bucket handle.
Make sure to smoothen out every roughness on the part you cut using the sandpaper so it doesn’t hurt your kid.
We hope these few tips will help reduce your plastic bottle trash and put a smile on your kid’s face during the weekend.
Expect more fun projects you can do with your kids, and remember that all plastic waste should be recycled.

