Whether you’re stretching a canvas in your studio or rolling a fresh coat onto a living room wall, the tools you reach for make a real difference in your results. Painters who understand their equipment don’t just work faster—they work smarter, waste less material, and produce cleaner finishes on every project.
This guide walks you through 43 painting tools for painters across every major category: brushes, application tools, surfaces, masking supplies, sprayers, easels, studio accessories, and layout aids. Each entry explains what the tool does, when to use it, and what to watch for so you can make confident choices whether you’re just starting out or adding to a well-stocked studio.
Pro Tip: You don’t need every tool on this list at once. Start with the essentials for your specific painting style, then expand your kit as your techniques grow.
1. Flat Brush
The flat brush is one of the most versatile tools in any painter’s kit. Its wide, squared-off bristle head lets you lay down broad strokes, fill large areas quickly, and create sharp, clean edges when you need them. You’ll find flat brushes in both natural and synthetic bristle options, and the right choice depends on your medium—natural bristles for oil paint, synthetic for acrylics and watercolors.
Use a flat brush when you want to block in background color, apply bold gestural strokes, or paint architectural elements like walls and doorframes in a composition. The straight edge also makes it easy to paint crisp lines along rulers or tape. Keep a few sizes on hand—a wide flat for coverage and a smaller one for detail work in tighter spaces.
2. Round Brush
The round brush is the workhorse of fine art painting. It comes to a tapered point that gives you excellent control over line weight—press lightly for a thin line, apply more pressure to swell the stroke into a broader mark. This makes it ideal for everything from detailed portrait work to loose, expressive brushwork in landscapes.
Round brushes hold a good amount of paint in their belly, so you can make longer strokes without constantly reloading. They’re available in sizes ranging from 000 (extremely fine) to 20 and beyond. If you’re building your first brush set, a medium round in the size 6–8 range is a practical starting point that handles both detail and fill work with ease.
3. Fan Brush
The fan brush has a spread-out, fan-shaped head that creates soft, feathery textures unlike any other brush. It’s most associated with landscape painting—think grass, foliage, clouds, and fur—but it also excels at blending wet paint on the canvas without leaving harsh marks.
You can use a fan brush dry for subtle blending or load it lightly with paint and stipple it across the surface for organic, irregular texture. Avoid overloading it with paint; a small amount goes a long way. Fan brushes come in both stiff and soft bristle versions, and each produces a noticeably different mark, so experimenting with both is worthwhile.
Key Insight: Fan brushes are underused by beginners but beloved by experienced painters. Even if you don’t paint landscapes, try one for blending sky gradients or softening background edges.
4. Filbert Brush
The filbert brush sits between a flat and a round—it has a flat ferrule (the metal band that holds the bristles) but an oval, rounded tip. This shape gives you the coverage of a flat brush combined with the soft, curved edges of a round, making it one of the most forgiving brushes to work with.
Filbert brushes are especially popular for portrait and figure painting because they create natural, flowing strokes that blend smoothly. You can use the tip for detail and the belly for broader coverage in a single stroke. Many painters who work in oils or acrylics consider the filbert their go-to brush for 80% of their painting.
5. Liner/Detail Brush
When you need precision, the liner brush—sometimes called a rigger or script brush—is the tool for the job. It has a long, thin body of bristles that holds a surprising amount of paint and releases it in a controlled, steady stream. This makes it perfect for fine lines, lettering, rigging on ships, branches, grass blades, and any detail work that requires a confident, continuous stroke.
The key to using a liner brush well is thinning your paint slightly so it flows freely off the tip. Load the brush fully, then use a light touch and let the bristles do the work. Rushing or pressing too hard causes the line to waver. With practice, a good liner brush gives you control that no other tool can match for intricate detail.
6. Mop Brush
The mop brush is a large, soft, dome-shaped brush with an absorbent belly that holds a generous amount of fluid paint or water. It’s a staple in watercolor painting, where it’s used to lay down broad washes of color quickly and evenly. In oil and acrylic work, mop brushes are excellent for softening edges and blending large areas without leaving visible brushstrokes.
Because mop brushes are so soft, they don’t push paint around aggressively—they deposit it gently. This makes them ideal for glazing techniques, where you apply thin, transparent layers of color over dried paint. If you work with watercolors, a quality mop brush is one of the first investments worth making.
7. Palette Knife Brush
The palette knife brush is a hybrid tool that combines a flexible painting knife blade with a brush handle, designed to apply paint in thick, textured strokes that mimic the look of palette knife painting while offering slightly more control over direction. It’s used in impasto techniques and mixed-media work where heavy texture is part of the visual language.
You’ll find this tool most useful when you want to add sculptural marks to a surface without switching between a brush and a separate knife. It works best with heavy-body acrylics or oil paint straight from the tube. Experiment with the angle and pressure to vary the texture—flat passes create smooth ridges, while the edge produces sharper, more defined marks.
Pro Tip: When building a brush collection, prioritize quality over quantity. Three well-made brushes in different shapes will outperform ten cheap ones every time. Look for brushes that snap back to their original shape after being bent gently—that’s a sign of good bristle resilience.
8. Paint Roller
The paint roller is the standard tool for covering large, flat surfaces efficiently in house painting and decorative work. A roller frame holds a cylindrical sleeve (the roller cover) that you load with paint from a tray, then roll across walls, ceilings, and floors. The nap—or thickness—of the roller cover determines the texture of the finish.
| Nap Thickness | Best Surface | Finish Result |
|---|---|---|
| 3/16″ – 1/4″ | Smooth drywall, wood | Very smooth, minimal texture |
| 3/8″ – 1/2″ | Standard drywall, plaster | Light stipple texture |
| 3/4″ – 1″ | Rough stucco, brick | Heavy texture, full coverage |
For interior walls, a 3/8″ nap roller is the most common choice. Always roll in a W or M pattern to distribute paint evenly before filling in the gaps. Using a roller extension pole reduces fatigue and lets you maintain consistent pressure across large surfaces without climbing a ladder for every pass.
9. Foam Roller
The foam roller is the go-to choice when you want an ultra-smooth, almost spray-like finish on flat surfaces. Because foam doesn’t have a fibrous nap, it applies paint with minimal texture, making it ideal for cabinets, furniture, trim, and any surface where you want a factory-smooth result.
Foam rollers work best with thinner paints and enamels. They’re not suited for rough or textured surfaces because the foam can’t push paint into the crevices the way a napped roller can. One downside: foam rollers can create small bubbles if you roll too fast or use paint that isn’t properly mixed. Roll slowly and steadily for the cleanest results.
10. Paint Pad
A paint pad is a flat, foam-faced applicator attached to a handle, designed to apply paint in smooth, even strokes with less splatter than a roller. Paint pads are particularly useful for painting edges, cutting in along ceilings, and reaching into corners where a roller won’t fit cleanly.
Some paint pads come with a built-in paint reservoir and wheels that guide the pad along a surface—these are especially handy for painting along baseboards or ceiling lines without tape. While paint pads don’t replace rollers for large open areas, they fill a useful gap in the toolkit for edge work and detail painting on flat surfaces.
11. Paint Mitt
The paint mitt is a glove-style applicator that lets you coat irregular, rounded, or hard-to-reach surfaces by hand. It’s particularly effective for painting pipes, railings, fences, shutters, and other objects where a brush or roller would be slow and awkward. You simply dip the mitt into paint and wipe it over the surface in smooth, even passes.
Paint mitts are available in both lambswool and synthetic versions. Lambswool holds more paint and works well with thicker coatings; synthetic mitts are easier to clean and better suited for water-based paints. If you work on exterior projects with a lot of curved metalwork or fencing, a paint mitt can cut your application time significantly.
Key Insight: Paint mitts are one of the most underrated tools for exterior painting. Painters who use them on fence and railing projects often report cutting their application time in half compared to using a brush.
12. Texture Roller
Texture rollers are specialty roller covers with a patterned surface designed to imprint texture into wet paint or plaster. They’re used in decorative painting to create effects like stippling, brick patterns, wood grain, and various geometric designs—all without stencils or hand-painting each element.
To use a texture roller effectively, apply a base coat first and let it dry completely. Then apply your texture medium or paint and roll the texture roller through it while it’s still wet. The pattern embeds into the surface and remains visible once dry. Practice on a scrap piece of drywall or cardboard first to get the pressure and overlap right before moving to your actual surface.
13. Palette Knife
The palette knife is a flexible, blunt-edged metal tool used for mixing paint on your palette and applying it directly to the canvas in thick, expressive strokes. It’s a foundational tool for impasto painting—a technique where paint is applied so thickly that it stands off the surface in three-dimensional ridges and peaks.
Palette knives come in a wide range of shapes: trowel-shaped, diamond-tipped, and elongated. Each shape creates different marks. A trowel palette knife is best for spreading large amounts of paint, while a diamond or teardrop shape gives you more precision for smaller marks. Using a palette knife instead of a brush produces a completely different visual quality—flatter, smoother passages of color with sharp, defined edges.
14. Painting Knife
While the terms are often used interchangeably, a painting knife is specifically designed for applying paint to the canvas, while a palette knife is primarily for mixing. Painting knives typically have a cranked (bent) handle that keeps your knuckles off the wet canvas surface as you work, giving you better control and preventing smudging.
The flexibility of the blade is a key factor. A more flexible blade spreads paint smoothly and creates soft edges; a stiffer blade gives you more resistance and control for precise marks. Many painters who work in oils or heavy-body acrylics keep several painting knife shapes in their kit to vary the texture and mark quality across a single painting.
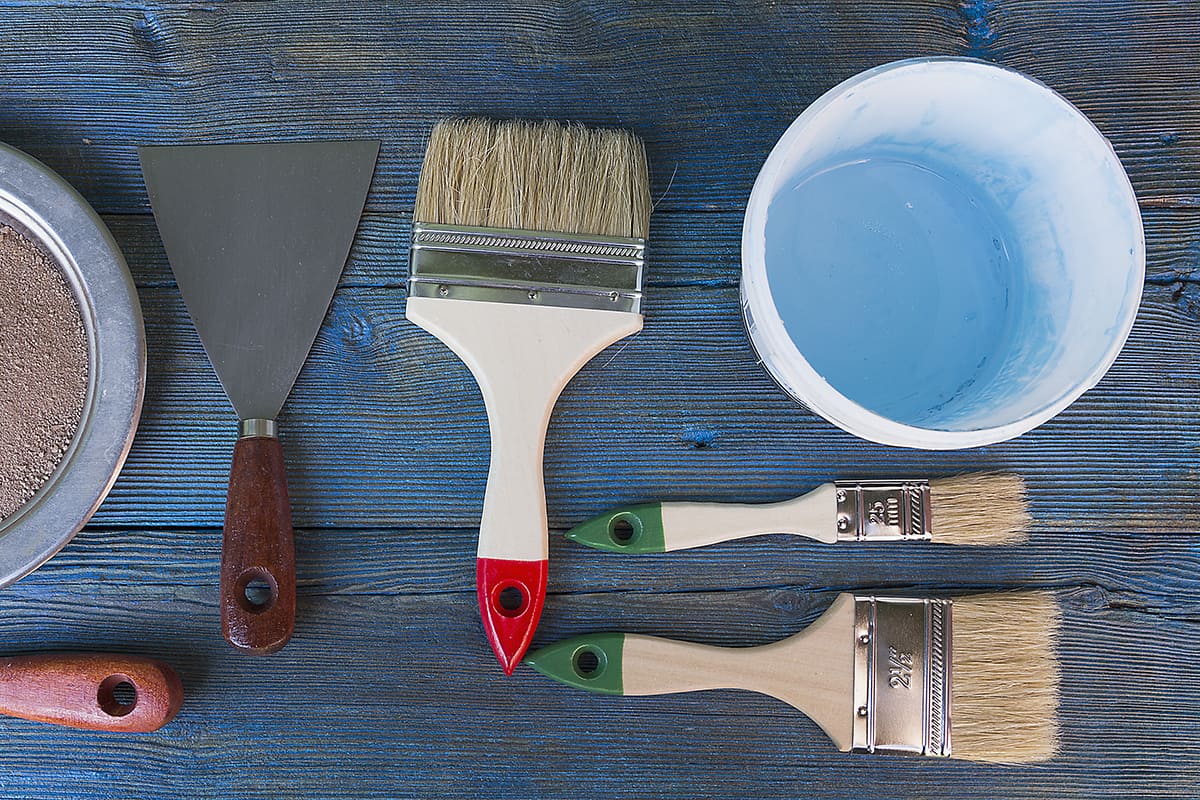
15. Putty Knife
The putty knife is a wide, flat-bladed tool used primarily in house painting and surface preparation. Its main job is to apply and smooth spackling compound, wood filler, or glazing putty into holes, cracks, and damaged areas before painting begins. A well-prepared surface is one of the most important factors in achieving a professional-looking paint finish.
Putty knives come in flexible and stiff versions. Flexible blades are better for applying and feathering filler into shallow depressions; stiff blades work better for scraping and removing old material. Keep both versions in your toolkit—they complement each other across different prep tasks. You can also find this tool useful for tile removal and surface prep work where the same scraping and spreading motions apply.
16. Paint Scraper
A paint scraper is used to remove old, peeling, or flaking paint from surfaces before repainting. It typically has a rigid metal blade set into a handle and is pulled or pushed across the surface to lift away deteriorated paint. Proper scraping is essential for adhesion—new paint applied over loose, failing paint will fail just as quickly.
Scrapers come in several configurations: pull scrapers with replaceable blades, hook scrapers for curved surfaces, and multi-edge scrapers with different blade profiles on each side. For large exterior scraping jobs, a heat gun used in combination with a scraper softens old paint and makes removal significantly easier. Always wear a dust mask when scraping older paint, particularly on pre-1978 surfaces where lead paint may be present.
Important Note: If you’re scraping paint from a home built before 1978, test for lead paint before you begin. Lead paint dust is a serious health hazard. Use an EPA-approved test kit and follow safe work practices if lead is detected.
17. Spackle Knife
The spackle knife—sometimes called a joint knife—is similar to a putty knife but is typically wider and designed specifically for applying and smoothing spackling compound over larger surface areas. It’s the primary tool for patching drywall, filling nail holes, and skimming uneven surfaces smooth before painting.
For small nail holes and minor imperfections, a 3–4 inch spackle knife is sufficient. For larger patches and skim-coating entire walls, a 6–12 inch knife gives you a wider coverage area and a smoother, more even result. The goal is always to feather the compound out thin at the edges so it blends seamlessly with the surrounding surface once dry and sanded.
18. Canvas (Stretched, Panel, Roll)
Canvas is the most widely used painting surface in fine art. It’s available in three main forms: stretched canvas (pre-mounted on a wooden frame, ready to paint), canvas panel (canvas glued to a rigid board, more portable and less expensive), and canvas roll (unprimed or primed canvas sold by the yard for custom cutting and stretching).
- Stretched canvas – Ready to use, available in standard sizes, ideal for studio painting and finished work meant for framing or display
- Canvas panel – Lightweight and travel-friendly, great for studies, plein air work, and practice pieces
- Canvas roll – Most economical for large or custom-sized works; requires stretching or mounting before use
Cotton canvas is the most affordable and widely available option. Linen canvas is stronger, smoother, and more archival—preferred by professional painters working in oils. When buying pre-primed canvas, check that it has been properly gessoed; thin or uneven priming can cause paint adhesion problems down the line.
19. Gesso Board
Gesso board is a rigid painting surface made from hardboard or MDF coated with multiple layers of gesso—a white, chalky primer that creates an ideal tooth for paint adhesion. It offers the stability of a wood panel with a surface texture closer to canvas, making it a popular choice for detailed work in oils, acrylics, and even gouache.
Because gesso board is rigid and won’t flex or warp like canvas, it’s particularly well-suited for highly detailed or thinly painted work where canvas movement might cause cracking over time. You can also apply additional layers of gesso yourself to adjust the texture—more layers create a smoother surface, while a single coat left with brush marks adds texture. Gesso boards are available pre-made or you can prepare your own using raw hardboard and acrylic gesso.
20. Wood Panel
Wood panels have been used as painting surfaces for centuries—many of the great Renaissance masters painted on carefully prepared wood. Today, painters use birch plywood, MDF, hardboard, and solid wood panels as durable, warp-resistant surfaces that work especially well for detailed, smooth-finish painting styles.
Before painting on raw wood, you need to properly seal and prime the surface. Unprimed wood is absorbent and acidic, which can cause paint to sink in unevenly and degrade over time. Apply a coat of GAC 100 or shellac-based primer first to seal the wood, then follow with two or more coats of acrylic gesso. Cradled wood panels—panels with a wooden frame attached to the back—are more resistant to warping and are the preferred choice for larger panel paintings.
21. Watercolor Paper
Watercolor paper is a specialized, heavy-weight paper designed to absorb water without buckling, warping, or deteriorating. It’s the standard surface for watercolor painting and also works well for gouache, ink, and light acrylic washes. The paper is available in three surface textures: hot press (smooth), cold press (medium texture), and rough (heavily textured).
| Surface Type | Texture | Best For |
|---|---|---|
| Hot Press | Very smooth | Detailed illustration, botanical art, pen and ink |
| Cold Press | Medium tooth | General watercolor painting, most techniques |
| Rough | Heavy texture | Loose, expressive work, landscape painting |
Paper weight matters significantly. 90 lb paper is the lightest and will buckle with heavy washes unless taped or stretched. 140 lb is the most common weight for general use and handles wet techniques well. 300 lb paper is thick enough that it rarely buckles even with very wet applications. For serious watercolor work, 100% cotton rag paper is the archival standard—it’s more expensive but produces noticeably better results than wood-pulp papers.
22. Palette (Glass, Wood, Paper, Stay-Wet)
Your palette is where you mix and hold your paint while you work, and the type you choose affects how quickly your paint dries, how easy cleanup is, and how accurately you can judge your colors. Each palette material has distinct advantages depending on your medium and working style.
- Glass palette – Easy to clean, stays cool (slows acrylic drying slightly), gives you a neutral surface for accurate color mixing; a piece of glass with white or grey paper underneath works well
- Wood palette – Traditional choice for oil painters; the warm tone of the wood can affect color perception, so many painters seal and tone their wood palette before use
- Paper palette – Disposable tear-off sheets; convenient for quick cleanup and travel; not ideal for long sessions where paint dries out quickly
- Stay-wet palette – Uses a damp sponge layer beneath a membrane to keep acrylic paint workable for hours or even days; essential for acrylic painters who work slowly or in dry climates
If you paint with acrylics and find your paint drying out before you can use it, a stay-wet palette is one of the most practical upgrades you can make. For oil painters, a traditional wood or glass palette works well since oils stay workable for hours on their own.
Pro Tip: To make your own stay-wet palette, line a shallow airtight container with a damp sponge or paper towel, then place a sheet of parchment paper on top. Your acrylic paint will stay workable for days when the lid is on.
23. Painter’s Tape
Painter’s tape is a low-tack masking tape designed to be applied to surfaces before painting to create clean, sharp edges and protect areas you don’t want painted. Unlike regular masking tape, painter’s tape is formulated to release cleanly without pulling up paint or leaving adhesive residue, even after several days on the surface.
The most important technique with painter’s tape is sealing the edge properly. After applying the tape, run a putty knife or your fingernail firmly along the tape edge to press it down completely. This prevents paint from bleeding underneath—the most common cause of ragged tape lines. Remove the tape while the paint is still slightly wet (not fully cured) and pull it back at a 45-degree angle for the cleanest result.
24. Masking Fluid
Masking fluid is a liquid latex solution used primarily in watercolor painting to protect areas of the paper from paint. You brush it onto the paper before painting, let it dry to a rubbery film, paint over it freely, and then rub it off once the paint is dry to reveal the preserved white paper underneath. It’s the most effective way to save bright highlights and fine white details in watercolor work.
Use an old or inexpensive brush to apply masking fluid—it ruins bristles quickly. Alternatively, use a ruling pen, a colour shaper, or a dip pen for finer lines. Once the masking fluid is fully dry (it will appear yellowish or slightly tinted), you can paint freely over it. Wait until your paint is completely dry before removing the fluid by rubbing gently with a clean finger or a rubber cement pickup eraser.
25. Frisket Film
Frisket film is a low-tack, self-adhesive transparent film used for masking in both traditional and airbrush painting. Unlike masking fluid, which is brushed on, frisket film is cut to shape with a craft knife and applied over the surface to create precise, hard-edged masked areas. It’s a favorite tool among airbrush artists and illustrators who need clean, complex shapes protected during painting.
To use frisket film, lay it over your surface, trace or cut your desired shape with a sharp blade (being careful not to cut into the painting surface beneath), remove the cutout section, and then paint over the exposed area. When you lift the film after painting, you’re left with a perfectly defined edge. Frisket film works on paper, illustration board, and primed surfaces, but always test a small piece on your specific surface first to ensure it won’t pull up the paint or paper when removed.
26. Masking Tape
Standard masking tape is a beige, medium-tack tape used for general-purpose masking in house painting and surface preparation. While painter’s tape is the better choice for most finished painting work, masking tape still has a place in the painter’s toolkit—particularly for protecting hardware, covering outlets, and securing drop cloths and plastic sheeting to surfaces.
One important distinction: masking tape is not designed to sit on painted surfaces for extended periods. It can pull up paint and leave adhesive residue if left in place too long, especially in warm conditions. Use it for short-term protection and non-critical masking tasks, and reach for painter’s tape whenever clean paint lines are the goal.
27. Airbrush
The airbrush is a precision spray tool that atomizes paint into a fine mist using compressed air, allowing for smooth gradients, subtle shading, and extremely fine detail that’s difficult or impossible to achieve with traditional brushes. It’s used across a wide range of applications: fine art, illustration, automotive painting, model making, nail art, and makeup.
Airbrushes come in two main action types: single-action (where you press the trigger to release both air and paint simultaneously) and double-action (where you press for air and pull back for paint, giving you independent control over both). Double-action airbrushes offer significantly more control and are preferred by most serious users. They also come in gravity-feed (paint cup on top) and siphon-feed (bottle below) configurations—gravity-feed requires less air pressure and is better for fine detail work.
Key Insight: Airbrush technique takes time to develop. Before working on a final piece, practice controlling the trigger on scrap paper to get a feel for how pressure and distance from the surface affect the spray pattern.
28. Spray Gun
A spray gun is a larger, higher-volume spray tool used for applying paint, primer, lacquer, and other coatings to large surfaces. Unlike an airbrush, which is designed for detail work, a spray gun is built for coverage—it can paint an entire wall, piece of furniture, or vehicle panel in a fraction of the time a brush or roller would take.
Spray guns connect to an air compressor and use a fan-shaped spray pattern that you can adjust for width and direction. HVLP (High Volume Low Pressure) spray guns are the most common choice for finish work because they transfer more paint to the surface and produce less overspray than conventional guns. Proper technique requires consistent distance from the surface (typically 6–8 inches), overlapping passes by about 50%, and keeping the gun moving at all times to avoid runs and sags.
29. Paint Sprayer
A paint sprayer—specifically an airless paint sprayer—uses a high-pressure pump to atomize paint without compressed air. This makes it capable of spraying thicker, undiluted coatings like latex house paint, stains, and primers at high speed. Airless sprayers are the tool of choice for professional house painters covering large exterior surfaces, fences, decks, and ceilings efficiently. You can learn more about how professional painters approach large-scale projects by reading about the world’s most successful painters and the tools and techniques that define their work.
The main challenge with airless sprayers is overspray control. Because they operate at high pressure, paint travels fast and far—masking and covering surrounding areas thoroughly before you begin is essential. Tip size selection matters too: smaller tips produce finer finishes for trim and cabinets, while larger tips move more material for fences and exterior walls. Always follow the manufacturer’s guidelines for dilution ratios and cleaning procedures to keep your sprayer in good working condition.
30. Mouth Atomizer
The mouth atomizer is one of the oldest spray tools in an artist’s kit—a simple two-tube device that uses your breath to atomize ink, watercolor, or fixative into a fine mist. You place one tube in the liquid and blow across the other at a right angle, creating suction that draws the liquid up and disperses it as a spray. It’s a low-tech, inexpensive tool that produces soft, diffused effects.
Mouth atomizers are used for creating soft backgrounds, applying fixative over charcoal or pastel drawings, and producing splatter and texture effects in mixed media work. They require some practice to control the spray direction and density, but they’re an accessible entry point into spray techniques without investing in an airbrush setup. Note that you should only use non-toxic, water-based media with a mouth atomizer for obvious safety reasons.
31. Studio Easel
A studio easel is a large, freestanding easel designed for use in a fixed studio environment. It holds your canvas or panel at a comfortable working height and angle, freeing both your hands for painting. Studio easels are built to be stable and sturdy—they can hold large, heavy canvases without tipping and often include a crank mechanism to raise and lower the canvas holder smoothly.
The most common studio easel styles are the H-frame (named for the H-shaped structure of its legs), the A-frame (a simpler, lighter tripod style), and the French easel (a combination easel and supply box). For a dedicated painting space, an H-frame studio easel is the most functional choice—it’s rock-solid, adjustable, and can handle canvases from small studies up to very large format work. If you’re setting up a painting workspace alongside other creative tools, it’s worth looking at how other skilled tradespeople organize their equipment, such as carpenters who rely on specialized tool setups for similar reasons.
32. Plein Air Easel
Plein air painting—painting outdoors from direct observation—requires a completely different easel than studio work. A plein air easel needs to be lightweight, compact, and quick to set up so you can work efficiently in the field. The most popular options are the French easel (which folds into a carrying case with built-in storage), the pochade box (a small, portable painting box that clamps to a tripod), and lightweight aluminum tripod easels.
When choosing a plein air easel, weight is a primary consideration—you’ll be carrying it to your painting location, often over uneven terrain. Stability in wind is equally important; look for easels with adjustable leg angles and a hook or weight attachment point to hang your supply bag for ballast. Many dedicated plein air painters prefer the pochade box setup because it keeps everything compact and organized while offering a solid, stable painting surface.
33. Table Easel
A table easel is a compact, desktop easel that holds your canvas or panel at an angle on a table or desk surface. It’s the most accessible easel option for beginners, apartment painters, and anyone without dedicated studio space. Table easels are inexpensive, take up minimal storage space, and set up in seconds.
While table easels have limitations for large-format work, they’re perfectly suited for small to medium canvases, canvas panels, and boards. They’re also useful for displaying finished work at art fairs and exhibitions. If you paint at a table regularly, look for a table easel with an adjustable angle so you can shift between a nearly flat position (useful for watercolor work) and a more upright position for oils and acrylics.
Pro Tip: If you’re just starting out and not ready to invest in a full studio easel, a quality table easel paired with a sturdy table is a perfectly functional setup for most small and medium painting projects.
34. Mahl Stick
The mahl stick (also spelled mahlstick) is a long, slender rod with a padded tip that painters use to steady their hand while working on fine detail. You hold one end and rest the padded tip on a dry area of the canvas or on the easel frame, then use the stick as a bridge to support your painting hand. This keeps your hand off the wet paint and reduces tremor for precise, controlled strokes.
Mahl sticks are particularly useful for portrait painters, miniaturists, and anyone doing tight detail work where hand steadiness matters. Traditional mahl sticks are made from wood or bamboo with a chamois-covered tip. Modern versions are often telescoping for adjustable length. You can also improvise a mahl stick using a dowel rod with a cloth-wrapped tip—it works just as well for most purposes.
35. Canvas Pliers
Canvas pliers are wide-jawed pliers specifically designed for stretching canvas tightly over a wooden stretcher frame. The broad, flat jaws grip the canvas evenly without tearing the fabric, allowing you to pull it taut while you staple or tack it to the frame. Without canvas pliers, getting a consistently tight, wrinkle-free stretch is difficult—especially on larger canvases.
To use canvas pliers, start by stapling the center of one side, then use the pliers to pull the opposite side taut and staple its center. Work outward from the center on each side in alternating pairs, pulling firmly and evenly. This cross-pulling technique ensures the canvas grain stays straight and the tension is distributed uniformly. Canvas pliers are inexpensive and make a noticeable difference in the quality of a hand-stretched canvas.
36. Brush Cleaner
Brush cleaner is a solvent or soap-based solution formulated to dissolve and remove paint from brush bristles. The right brush cleaner depends on your painting medium: water and mild soap for acrylics and watercolors, mineral spirits or odorless turpentine for oils, and specialty brush cleaners for dried or stubborn paint buildup.
Cleaning your brushes thoroughly after every session is one of the most important habits you can develop as a painter. Paint left in the ferrule (the metal band near the handle) dries and splays the bristles permanently, ruining the brush. Work the cleaner through the bristles from tip to ferrule, reshape the brush to its original form, and store it bristle-up or flat—never bristle-down in a container. For other professional trades that rely on clean, well-maintained tools, the same principle applies—you can see similar care standards in guides for hair stylists who maintain their brushes and tools with equal diligence.
37. Solvent Jar
A solvent jar is a sealed container used to hold mineral spirits, turpentine, or other painting solvents for cleaning brushes and thinning oil paint during a painting session. Quality solvent jars have a coiled metal insert at the bottom—you swirl the brush through the coil to dislodge paint particles, which then sink to the bottom while the clean solvent rises to the top.
Using a solvent jar properly extends the life of your solvent significantly. Instead of dumping dirty solvent after each session, let it sit undisturbed so the paint particles settle to the bottom. Pour off the clean solvent from the top into a clean container for reuse, and dispose of the settled sludge according to your local hazardous waste guidelines. Never pour solvent down the drain—it’s a pollutant and a fire hazard.
38. Brush Washer
A brush washer is a container specifically designed for cleaning brushes during and after a painting session. For watercolor and acrylic painters, a simple wide-mouthed jar of water serves as a brush washer. For oil painters, a dedicated brush washer with a sealed lid, a coiled cleaning insert, and a pour spout for solvent management is the more practical choice.
Some brush washers include a built-in brush rest that holds your brushes above the cleaning solvent between strokes, preventing the bristles from sitting in liquid (which can loosen the glue in the ferrule over time). Keeping two containers of water for acrylic and watercolor work—one for rinsing dirty brushes and one for clean water to use in your mixes—is a simple habit that keeps your colors clean and your work more accurate.
39. Palette Cleaner
Palette cleaner is a solvent or scraping solution used to remove dried or wet paint from your palette surface after a painting session. For glass and ceramic palettes, a palette scraper or razor blade removes dried acrylic or oil paint cleanly without scratching the surface. For wood palettes, a rag dampened with solvent works well for oil paint residue.
Keeping your palette clean matters more than many beginners realize. Leftover dried paint can contaminate fresh mixes, and a cluttered palette makes it harder to judge color relationships accurately. After cleaning, some oil painters condition their wood palette with a thin wipe of linseed oil to prevent the wood from drying out and cracking. Paper palettes sidestep the cleaning issue entirely—just tear off the used sheet and start fresh.
Common Mistake: Letting acrylic paint dry on a glass or ceramic palette and then trying to soak it off with water alone. Dried acrylic is essentially a plastic film—use a palette scraper or isopropyl alcohol to lift it cleanly without scratching the surface.
40. Rags/Lint-Free Cloths
Rags and lint-free cloths are essential consumables in any painter’s studio or job site. You’ll use them for wiping brushes, blending paint directly on the canvas, cleaning up spills, applying and removing glazes, and a dozen other tasks that come up during a typical painting session. The “lint-free” distinction matters because standard cotton rags can leave fibers on wet paint surfaces—particularly problematic in fine art work.
Old t-shirts cut into squares make excellent lint-free painting rags for most purposes. Purpose-made lint-free cloths (similar to those used for automotive finishing) are worth keeping on hand for your most critical tasks. For house painters, a supply of clean rags is equally important for wiping tools, cleaning up drips, and applying stain or wood conditioner. Keep a dedicated container for used solvent-soaked rags and dispose of them safely—solvent-saturated rags can spontaneously combust if bunched together.
41. T-Square
The T-square is a measuring and drawing tool consisting of a long blade and a perpendicular head that hooks over the edge of a flat surface—traditionally a drawing board. When the head is held flush against the board edge, the blade lies perfectly horizontal, allowing you to draw accurate parallel lines and establish a consistent reference for other measurements.
In painting, the T-square is most useful for painters working in geometric abstraction, architectural subjects, or any work that requires precise horizontal and vertical reference lines. It’s also used in surface preparation—marking out sections for decorative painting, tile-like patterns, or mural grid layouts. Paired with a set square or triangle, a T-square lets you establish a complete grid of right angles across any surface quickly and accurately.
42. Ruler
A ruler is one of the most straightforward tools in a painter’s kit, but its usefulness extends beyond simply measuring distances. Painters use rulers to draw straight lines, check proportions, transfer measurements from a reference image to a canvas, and establish compositional divisions like the rule of thirds or golden ratio. A metal ruler is preferred over plastic for use with craft knives and scoring tools because the blade won’t catch and cut into the edge.
For studio painters working on large canvases, a long metal straightedge (24 inches or more) is more practical than a standard 12-inch ruler. Keep a shorter ruler for detail work and proportion checking. If you’re working on large-scale decorative or mural projects, a folding carpenter’s rule or a tape measure extends your range further. Similar layout tools are staples across skilled trades—electricians, plumbers, and carpenters all rely on precise measuring tools as covered in guides for electricians’ essential equipment and plumbing tool kits.
43. Chalk Line
A chalk line is a tool used to snap long, straight reference lines across large surfaces—walls, floors, ceilings, and canvases. It consists of a string coated in colored chalk powder wound inside a case. You hook one end, pull the string taut across the surface, lift it slightly, and release it—the string snaps down and leaves a perfectly straight chalk line that you can follow with paint or use as a layout guide.
For painters working on murals, large decorative projects, or exterior house painting, a chalk line is far faster and more accurate than drawing long lines by hand. The chalk wipes away easily after the paint is applied, leaving no permanent mark. For interior decorative painting—like adding a chair rail line, wainscoting border, or striped wall pattern—a chalk line is one of the most efficient layout tools available.
44. Pencil/Charcoal
Pencil and charcoal are the primary drawing tools used to sketch a composition onto a painting surface before applying paint. Pencil is better suited for detailed, precise underdrawings on smooth surfaces—particularly for watercolor and gouache work where control matters. Charcoal is favored by oil and acrylic painters for its ability to make broad, expressive marks that can be easily dusted off and corrected before committing to paint.
When using pencil under watercolor, keep the lines light—heavy pencil marks can show through transparent washes. For charcoal underdrawings under oil paint, dust off the excess charcoal with a soft cloth before painting to prevent it from muddying your first paint layers. Vine charcoal is the softest and most erasable variety; compressed charcoal is darker and more permanent—useful when you want the underdrawing to remain visible as a guide through multiple painting layers.
Pro Tip: For oil painters, fix your charcoal underdrawing with a light spray of fixative before applying paint. This locks the charcoal in place so it doesn’t lift and contaminate your paint layers as you work.
45. Grid Tool
A grid tool is used to divide a reference image and a painting surface into matching grids of equal squares, allowing you to transfer proportions accurately from one scale to another. It’s one of the oldest and most reliable methods for scaling up a drawing or photograph onto a larger canvas without distorting the proportions. Artists have used grid-based transfer methods since the Renaissance.
Modern grid tools range from simple transparent acetate sheets with printed grids (placed over a reference photo) to digital apps that overlay a grid on a reference image on your phone or tablet. On the canvas side, you lightly draw the corresponding grid in pencil or chalk, then transfer the contents of each square one at a time. This method works for any subject and any scale—it’s particularly useful for portrait painters and muralists who need precise proportion control. Once the painting is complete, the grid lines are covered by paint or erased, leaving no trace of the underlying structure.
Understanding your tools is only the beginning of the journey as a painter. Whether you’re focused on fine art techniques or professional painting projects, having the right equipment—and knowing how to use it—gives you a genuine advantage at every stage of your work. Just as specialists in other skilled trades invest in purpose-built tools for their craft, from gardeners choosing the right implements to carpenters selecting precision woodworking tools, painters benefit from the same thoughtful approach to their toolkit.
Start with the tools that match your current medium and working style, keep them clean and well-maintained, and add new tools as your techniques and projects expand. Every tool on this list solves a specific problem—and once you know what each one does, you’ll recognize exactly when you need it.